Waterfall Table – Build a Waterfall Grain C-Table

Challenging Myself

This project was by far my most challenging to date.  Not only was this my first time working with hickory, which is really hard stuff, but it was also my first waterfall table, in fact it was my first table of any sort.  The lumber for this project came from a local sawyer a little southwest of St. Louis, MO.  I only had one board long enough to do the continuous grain and all of the hickory stock was 4/4 thick.  Because I wanted the table to be a little beefier I used some other pieces to laminate together to get a thicker slab.

Let’s Build a Waterfall Table

I started off by cross cutting the hickory boards down to rough length.  There were a few cracks and other defects to work around because I needed to get the maximum width possible in order to make the waterfall table wide enough.

Milling the Rough Lumber

Once the boards were down to more manageable pieces I took them over to the planer and skip planed them to get them mostly flat.  If you are not familiar with the terminology, skip planning is where you take light passes with the planer and flip the board over and/or end for end with each pass.  This won’t take large twists/bows/cups out but if the lumber is already fairly flat this technique works pretty well.

It was about this point where I had the idea to add a the walnut accent so in addition to running the hickory over the jointer I also grabbed the big piece of walnut I had and jointed a nice flat edge on it in preparation for the table saw.

Back to the Table Saw

From the jointer we go back to the table saw to clean up the opposite edge of the hickory and cut a section of walnut which is then cut into 1/4 inch strips.  Because of the thickness of the walnut I made the cut for each of the strips in 2 passes.  This probably wouldn’t be necessary if you have a 3hp or larger saw but mine is only 1.75hp so it’s just a little easier on the saw to not try to take that much material in one pass.  A bandsaw would also be great for this operation.

Adding the Walnut Accents

In order to glue in the walnut strips I used a router and a strait edge guide to route a 1/4 inch deep rabbet on each side of the longer piece of hickory that will make up the top of the laminated slab.  The walnut strips and rabbets could have been much narrower that what I made them.  I knew I wanted to bevel the underside of the waterfall table and I wasn’t sure how much of the walnut would be cut away during that process so I was overly conservative.  Once I had most of the material removed I cleaned up the surface with a hand plane before gluing the walnut strips in.

With the surfaces prepared I glued the walnut strips to the hickory.  The walnut strips were not long enough to cover the full length of the hickory board so I used two pieces on each side.  The spot where they meet will be cut away when creating the mitered “waterfall” joint.  The second layer of hickory also has a seem at this same spot.  This took some planning ahead of time to think through where the miter cut would be to make sure the seam would be removed in the process.

Laminating the Slab

Once the walnut glue-up was dry I ran the piece through the planer taking very light passes just to make sure the walnut and hickory were even so the next glue up of the second layer of hickory would not have any issues.  I added a lot of glue and spread it around with a silicone spreader from Rockler and then added the second piece of hickory and a ton of clamps.

The same process of glue and clamps is repeated for the second backer piece of hickory.  For each piece I let the glue sit 24 hours just to make sure it was good and cured.  I then took the whole slab over to the jointer to clean up one edge and to the table saw to clean up the other edge.

The final step was to clean up any milling marks with the #7 Stanley which left a super smooth finish.   This could also be accomplished with sanding.

Now that the slab was glued up and ready I took a little time to fill in some of the larger bug holes and other small defects with some 5 minute epoxy.  This step probably wasn’t completely necessary since most of these spots were not all that deep but I wanted the waterfall table to be really smooth and I think in the end it was worth the extra effort.

Let’s Add Some Detail

The next step was to add all of the bevels/chamfers to the pieces of the waterfall table.  I started with the main slab and I cut the bevels prior to making the miter cut so that I had the best chance of everything lining up when assembled.  I also added bevel and chamfer cuts to the base.

Building the Base

Other than making the miter cuts for the waterfall table edge the main slab for the table was complete so I moved on to making the base.  I wanted the base to be a little wider than the table itself but I didn’t have any hickory wide enough to do the job so I started by laminating two pieces together after a bunch of hand plane work to get them reasonably flat.

To make up the extra width I cut another piece of walnut and jointed and planed it down to approximately the same thickness as the laminated hickory pieces.  As you can see from the picture below the grain in this piece of walnut was incredible!

Preparing for Glue-up

With the glue up dry and the walnut ready I broke everything down to final size at the table saw and then proceeded to glue the pieces together to form the base.  One thing to note here…at this point the walnut was still a little thicker than the hickory so it made it impossible to add any sort of cauls during the glue-up to keep the parts from shifting around.  I was able to keep things pretty well in place but it would have been much easier and made more sense to plane the walnut down just a bit more so they would have lined up a lot better.  Lesson learned!

Cutting the Mortise

I used a forstner bit to hog out most of the material for the mortise that will hold the table to the base and then cleaned it up with a chisel.  Another mistake I made here was not scoring the underside of the base where the mortise would come through.  I ended up with a fair amount of blowout on the bottom that I went back and filled with epoxy.

Cutting the Waterfall Miter

Now we come to the most stressful part of the build…cutting the main slab into two pieces with a 45 degree miter and then cutting the opposing miter on the other piece.  I spent more time than I like to admit mulling this over before finally making the first cut.  I thought for sure I would make the second miter cut and the pieces would fit together the wrong way!  Ultimately, it turned out great and I was able to complete the miter cuts and the grain lines still matched up really well.

Creating the Tenon

Now that the vertical and horizontal parts were separated and the miter was looking good I used the table saw and chisel work to create the tenon at the base.  This was my first mortise and tenon joint so I took it really slow and crept up on the fit with a combination of chisel and sanding.  It fit together great but as you will notice in the video I had a major oops here.  I was not thinking about the bevel on the tenon when I cut the mortise so when I put the two together there were little triangle holes in the two front corners.  I fixed these later by making some small pieces to glue into the holes from the bottom and then flushed them with a chisel after the glue dried.

Stressful Miter Glue-up

Gluing the mitered joint for the waterfall table edge was quite a challenge.  I used a couple of different shop made clamping jigs to help get good pressure on the joint and keep it square during the process.  As you can see in the picture below the 90 degree clamping blocks helped me to keep the pieces at the proper angle and the strips with sort of a triangle shape on the end enable me to clamp directly across the miter in order to pull the pieces together nice and tight.

Adding Splines for Strength

With both surfaces of the glue joint being end grain the glue joint by itself is not super strong.  It will hold up okay but in order to add some reinforcement I cut three splines into the joint using my crosscut sled.  I attached a cross piece of MFD to act as a stop and then used my Wixey digital angle finder to get the piece set to 45 degrees before making the cut.

I cut a few small pieces of walnut to glue in as the splines.  Once the glue had set up I trimmed them off with a hand saw and then flushed them up with a hand plane and sanding block with 220 grit paper.

Joining the Table to the Base

The final step for assembly was to add glue to the mortise and tenon and clamp the pieces together.  I also took this time to glue in the two small pieces I mentioned above to fill in the two triangle holes left from the mistake I made on the mortise.

Finally Time for Finish

The final step…which is also the most satisfying…is adding the finish!  I applied 3 coats of Tried & True Varnish Oil followed by 3 coats of Tried & True Original Wood Finish to the waterfall table.  The varnish oil gets into the wood and has some resins that will harden and make for a more durable surface.  The original finish has beeswax in it which leaves a deep and rich finish that I really love.  It’s also great that it doesn’t have the harsh chemicals so you don’t need to wear a respirator and such while applying it.

Project Wrap Up

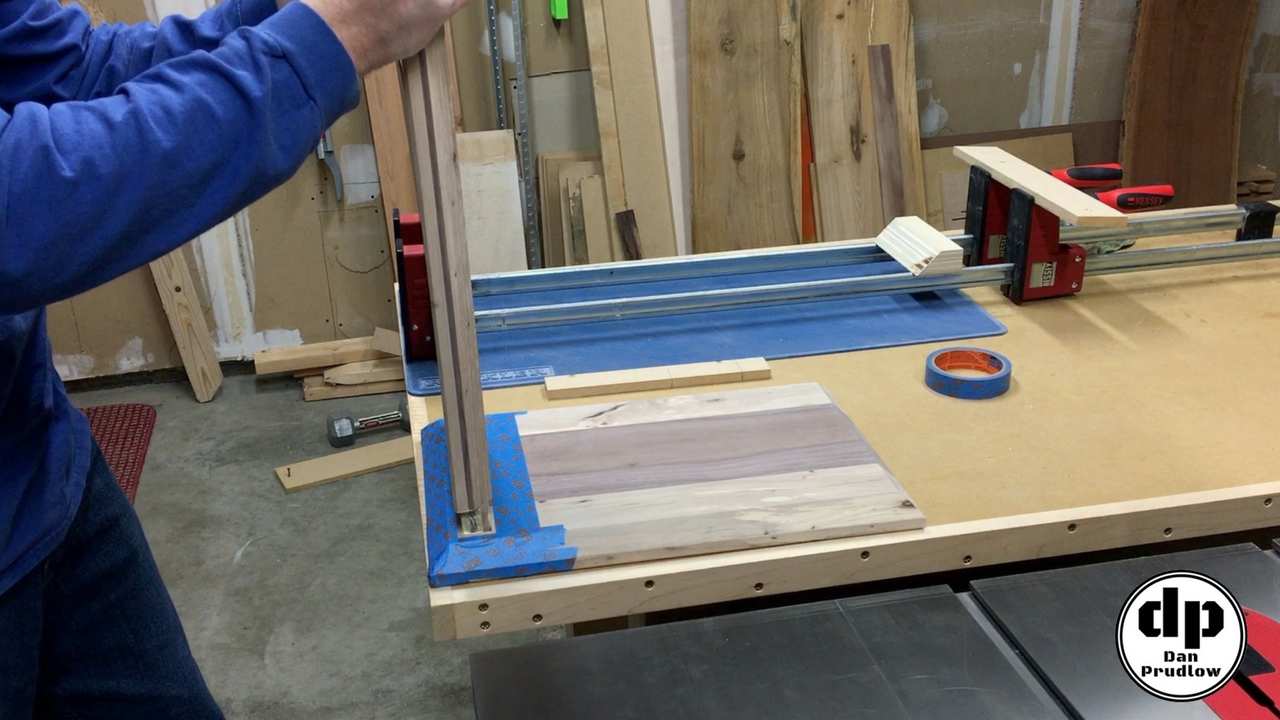
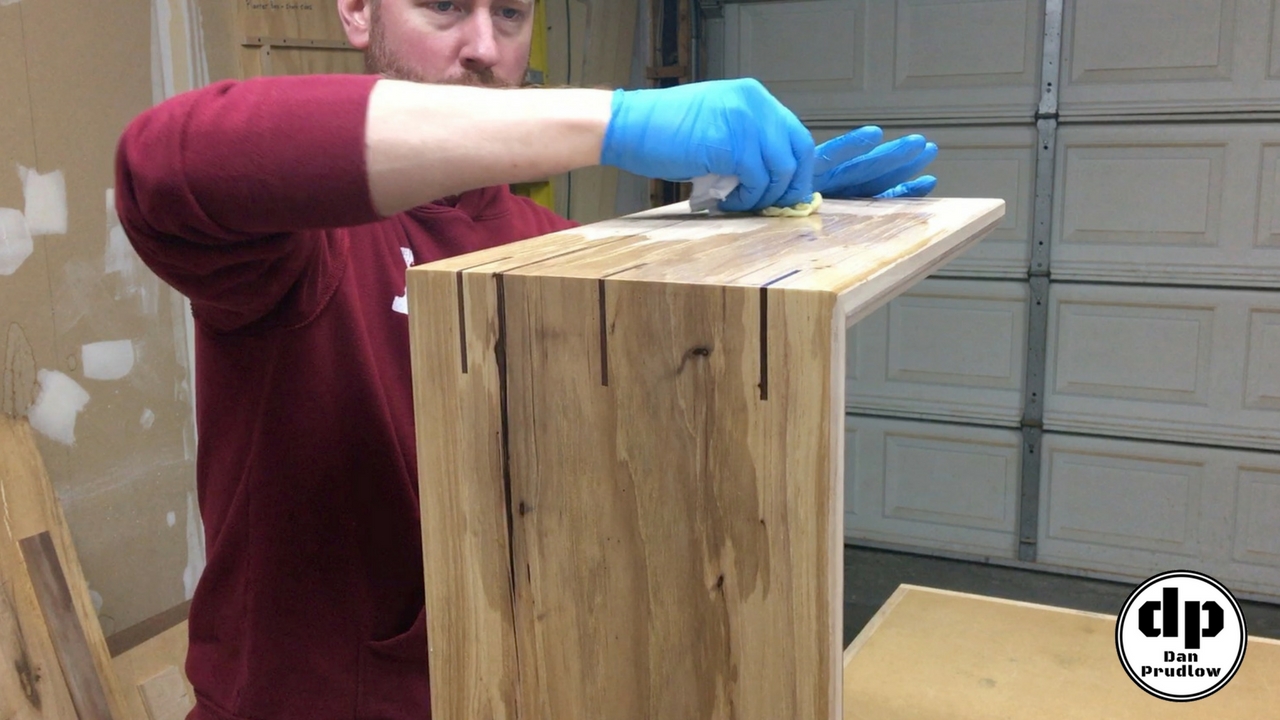
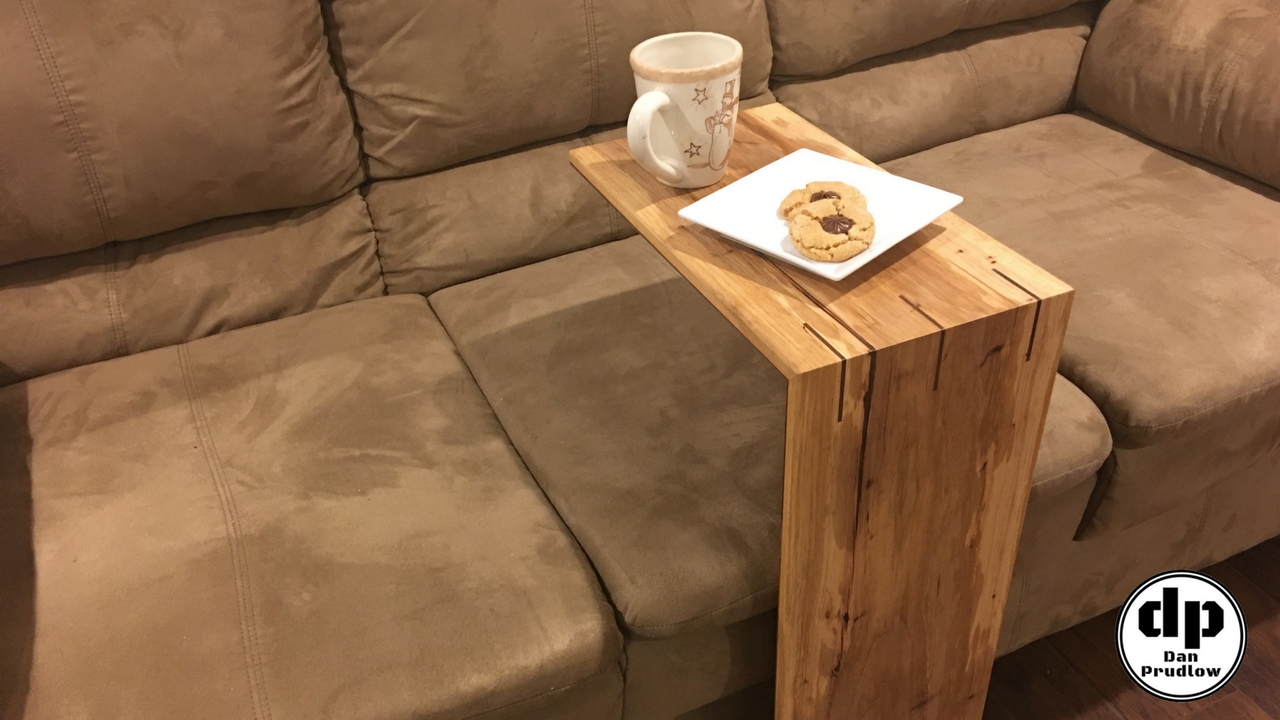
That wraps up this waterfall table project.  This was a big project with a lot of steps and details but I really love the end result.  It was definitely worth all the effort.  We gave this table to my in-laws for Christmas and they love it and use it almost daily around the couch.

If you have any questions or comments leave them in the comments section below.  You can also find me on Twitter and Instagram or you can send me a message via the contact page.  Also, please be sure to get subscribed to my YouTube channel so you don’t miss any future builds!

You can find links to many of the tools, accessories, and finish products I use in my shop over on my Tools & Resources page.

Thanks for stopping by!

Dan