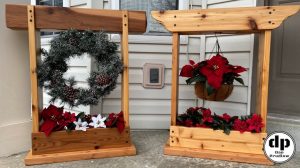
Mailbox Post – Reclaimed Cedar Timber – No Glue or Screws
Timber Frame Magic
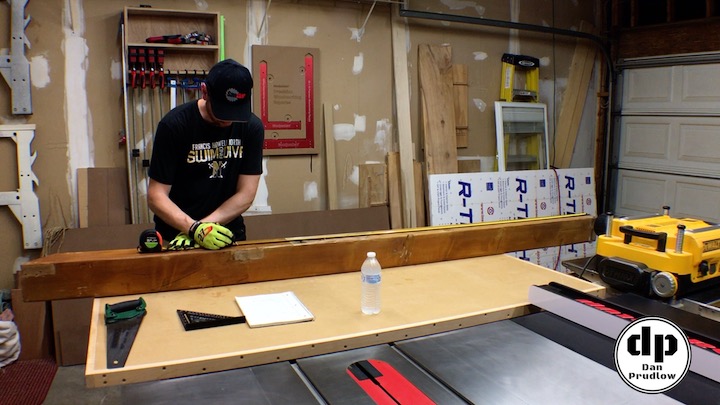
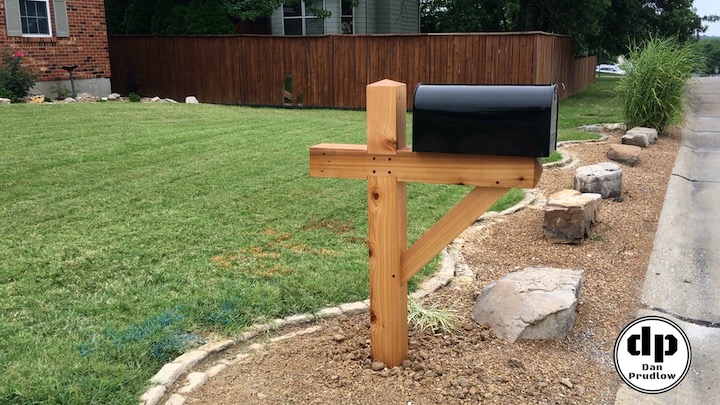
Our old mailbox post had been on its last leg for quite a while and high winds during a summer storm finished the job. I had been planning to replace the post and now it was a necessity. I knew I wanted to build one and since I had recently acquired a bunch of old cedar deck material…it was time to get to work! It’s not perfect but for my first try at timber frame type of joinery I’m really happy with the result.
Working with Reclaimed Lumber
Because the lumber is reclaimed from a deck the first step is to look over the boards to make sure there are no remaining nails, screws, bolts, etc. A chunk of metal would do serious damage to tools and be a safety hazard. If you have a SawStop like I do it would most likely trip the brake system and cost you a brake cartridge and a new blade.
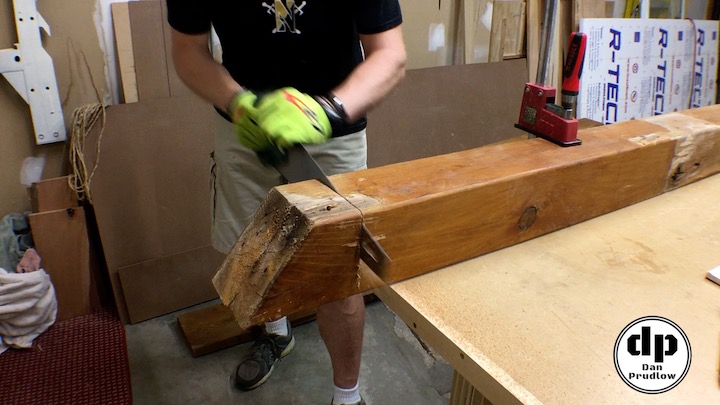
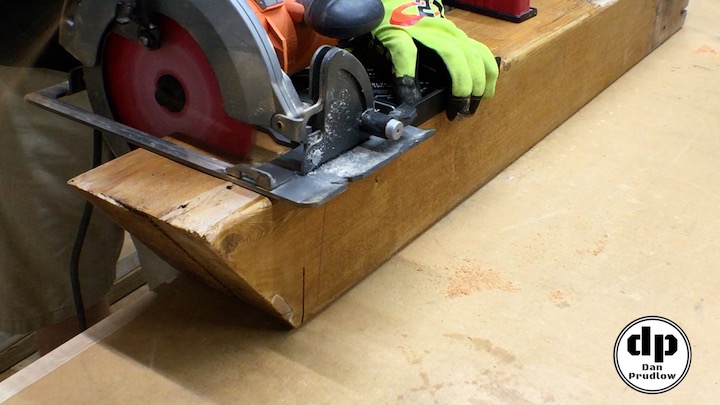
Once the lumber is clear of any old fasteners it is time to start breaking things down. I made my first cut with a hand saw and quickly realized that would take forever so I switch to the circular saw. Next I made 4 cuts around each post and then finished the small center section remaining with the hand saw.
Milling the Timbers
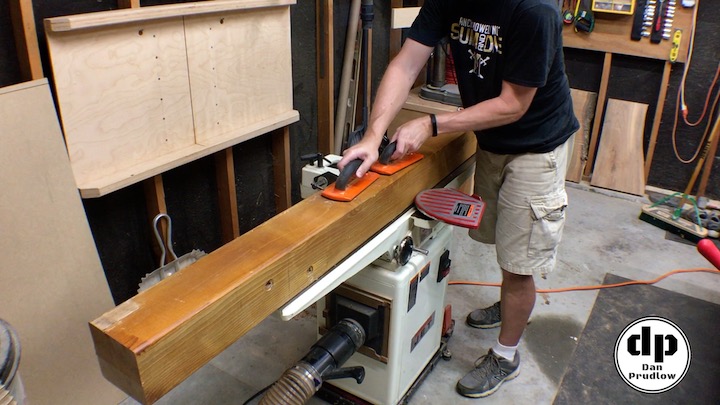
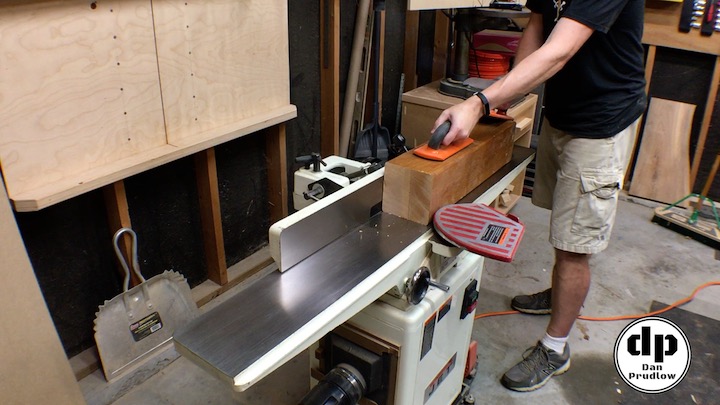
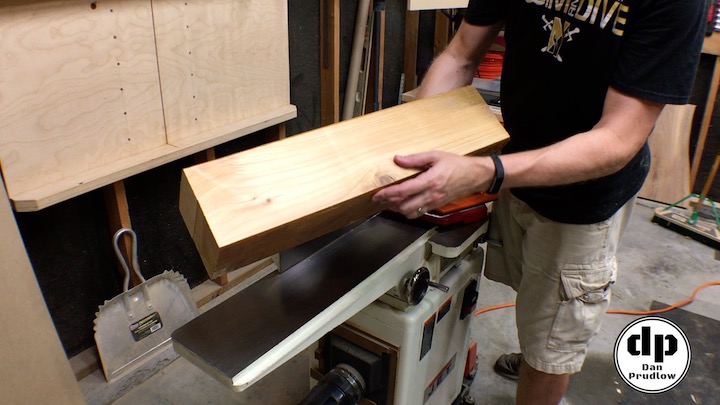
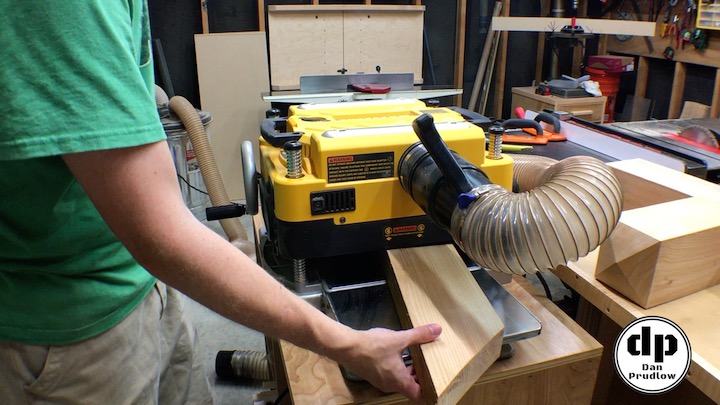
The next step in this build was to mill all of the old lumber. This process served two purposes. First it removes all of the old rough and stained surfaces. The second is to get the lumber as straight and square as possible prior to starting any joinery. I started at the jointer taking light passes until all of the old surface was removed. I then turned the board 90 degrees and milled a second face square to the first face that was milled. This gives me two faces that are square to each other.
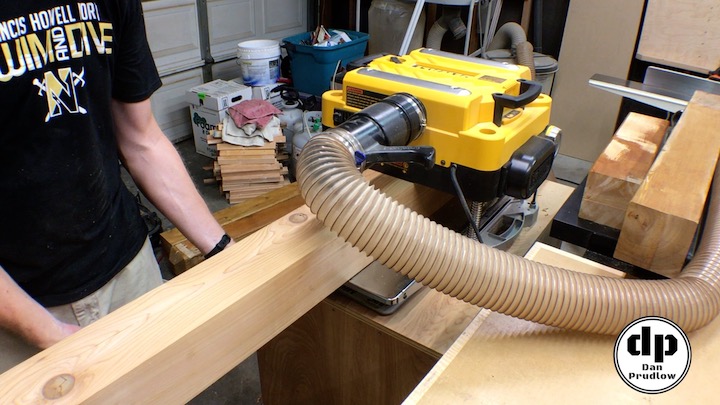
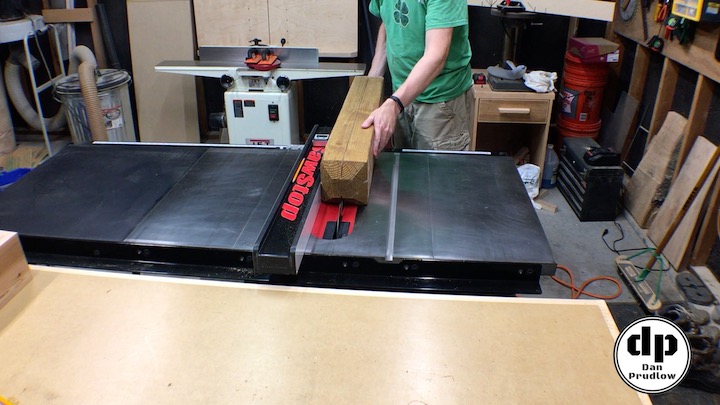
With two faces square I moved to the planer and took light passes until the stock was down to about 5 1/4 inches thick. Lastly I took the stock over to the table saw to cut the final rough face off and take the stock down to 5 1/4 inches wide. With everything milled to final thickness it is time to lay out the joinery.
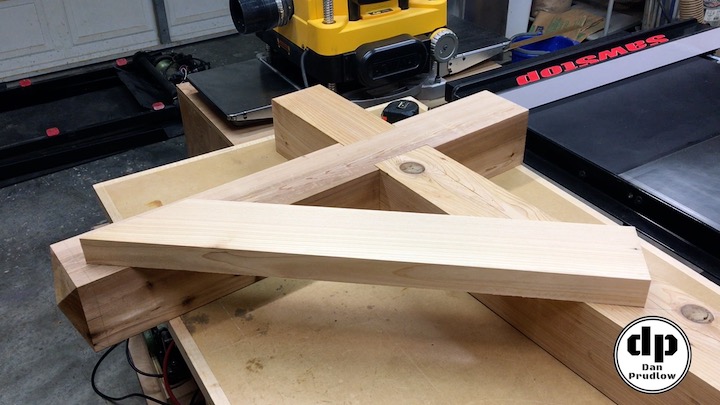
Mortise & Tenon Mailbox Post
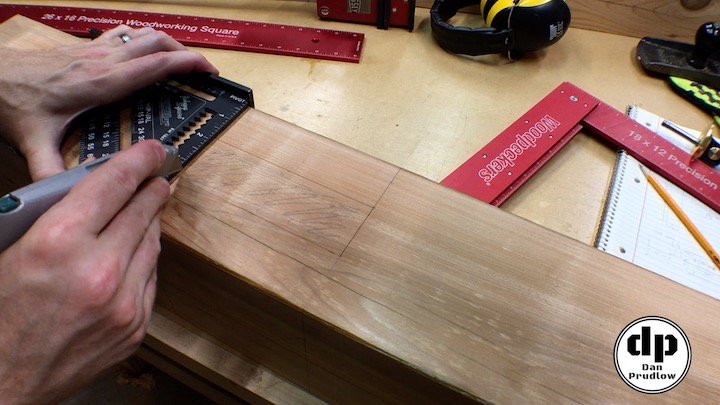
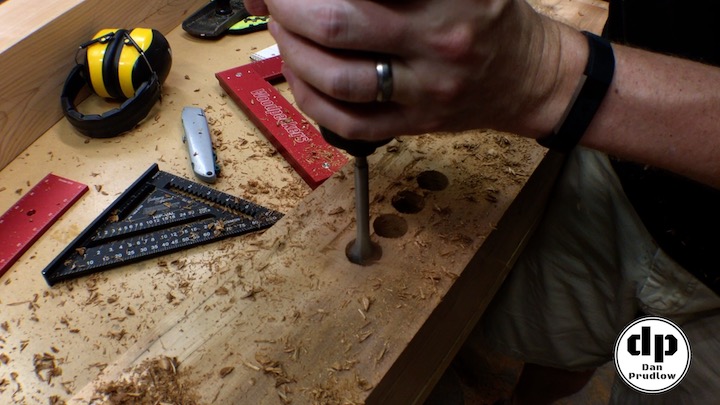
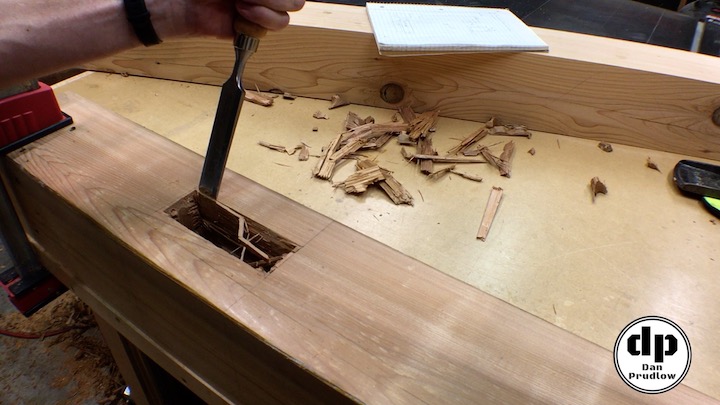
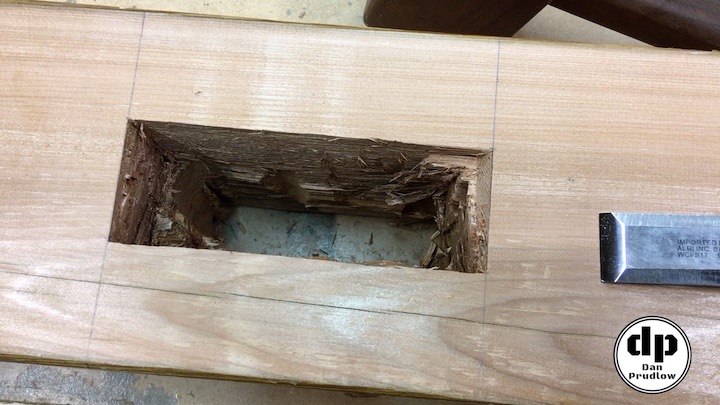
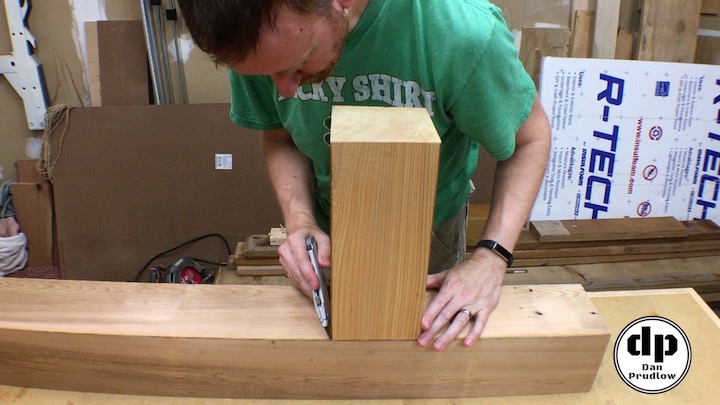
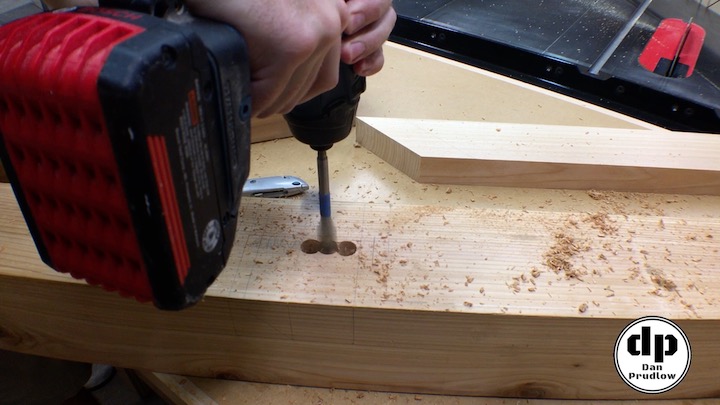
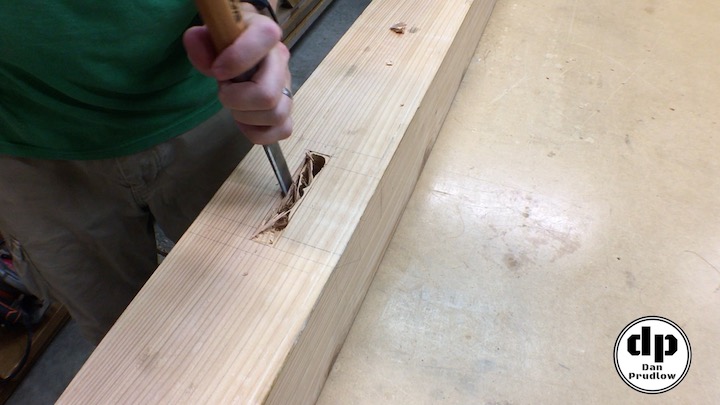
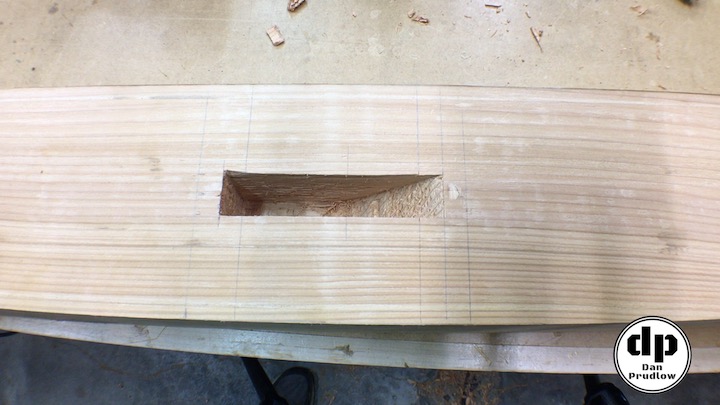
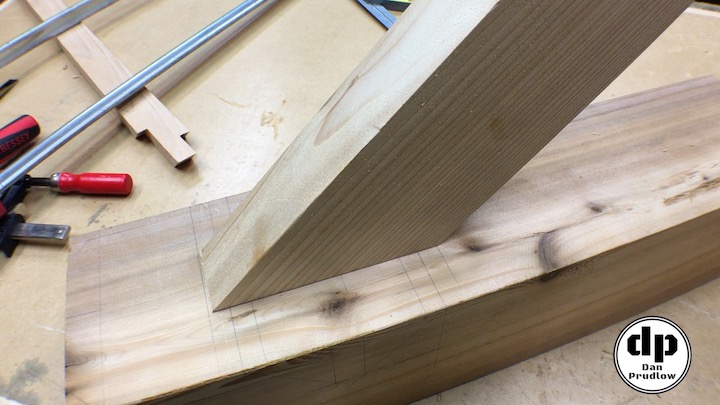
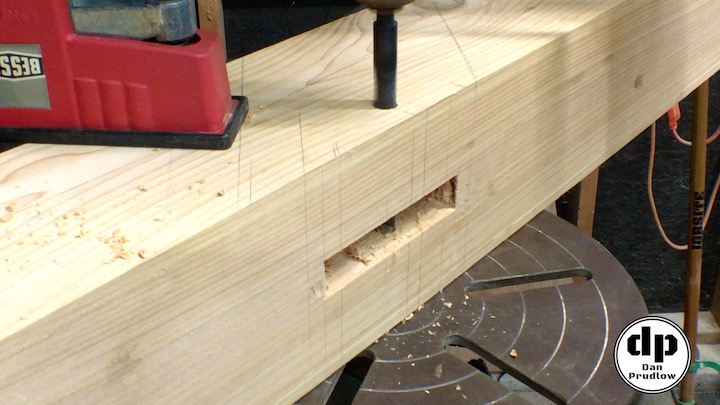
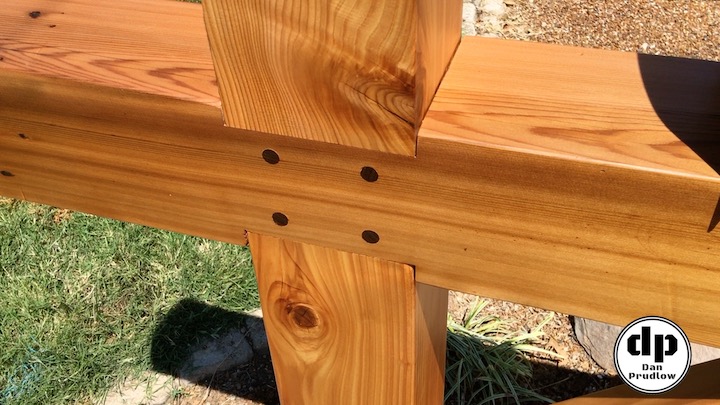
The joinery for this mailbox post is draw-bore mortise and tenon. To get started I laid out a large through mortise on the horizontal timber. Using a marking gauge and razor knife I scored the perimeter of the mortise on both sides of the stock. I then used a 1 inch spade bit to remove a large portion of the material. I drilled in to about the center from both sides. The reason for drilling from both sides is to avoid blowing out the fibers on one side when the bit breaks through. Next I spent a lot of time removing the remaining material with a chisel until I had a nice clean through mortise. Note the picture below is not the final mortise…just a progress shot as I was nearing the end of the chisel work.
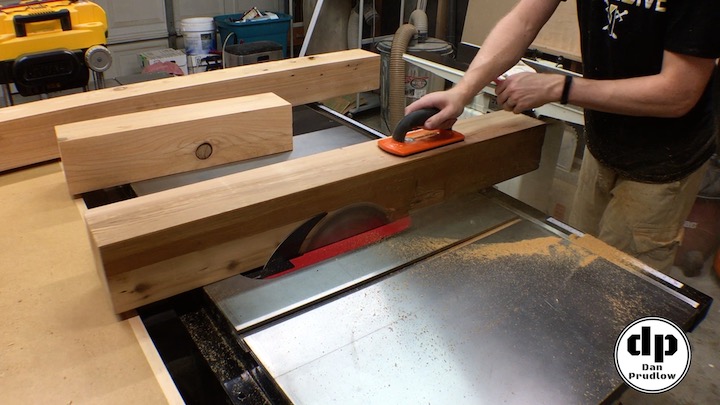
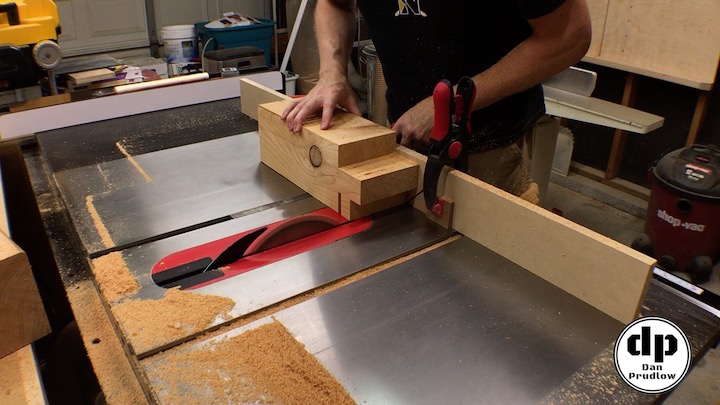
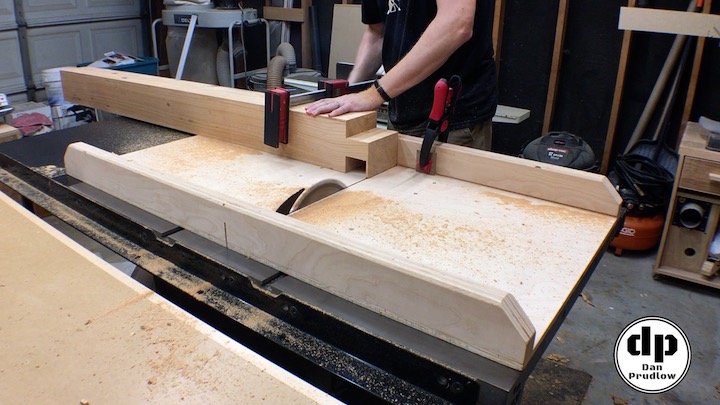
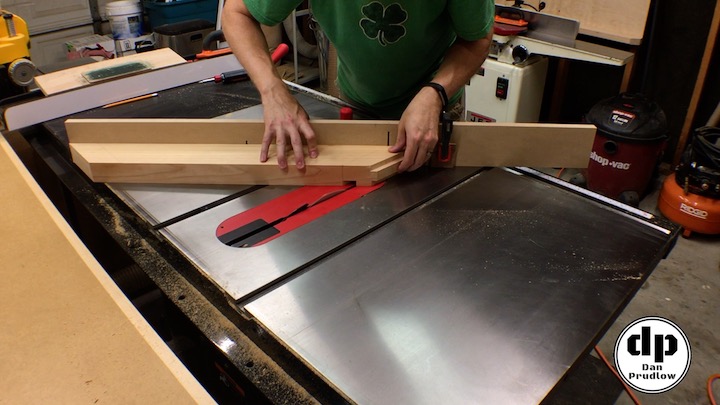
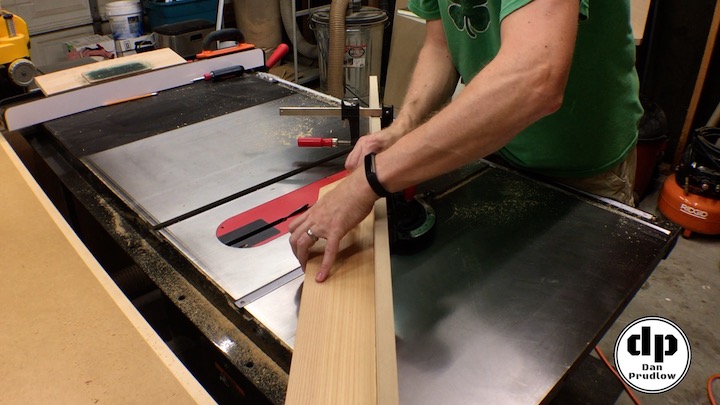
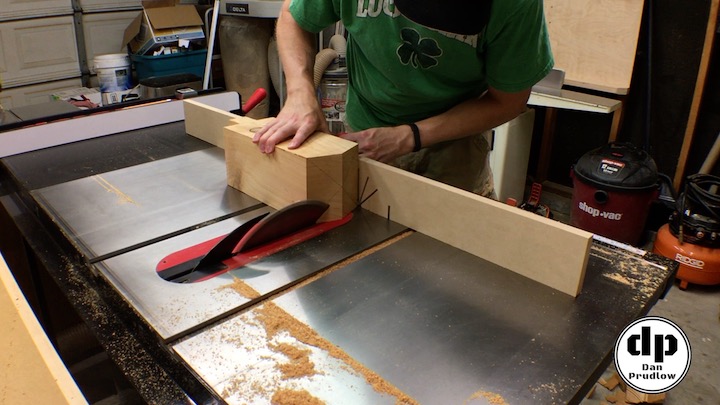
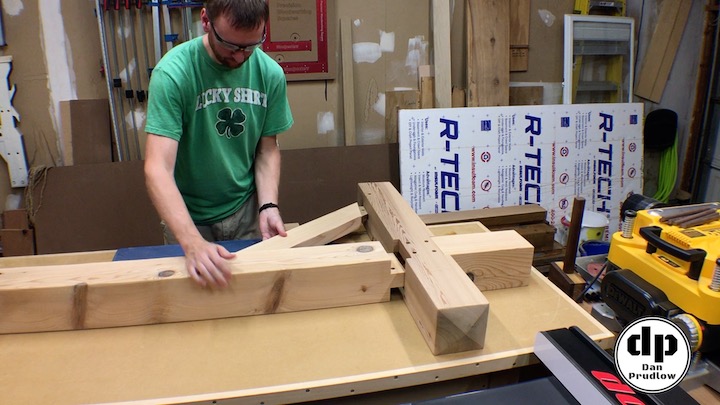
With the mortise cut I could now use the table saw to cut the tenons on both the main post as well as the small top section. Since the top section was smaller and easier to manage on the table saw I used it to dial in the exact with of the tenon. With a nice snug fit confirmed I moved on to cutting the tenon on the large post using the same method. The weight and size of the large post required a little more setup and some clamps to keep everything in place while making passes over the blade. Since I don’t have a dado stack it took quite a while to make a pass, loosen the clamp, shift the stock, re-clamp, and finally make the next pass. Using the clamp made the process much safer so it was worth the extra time.
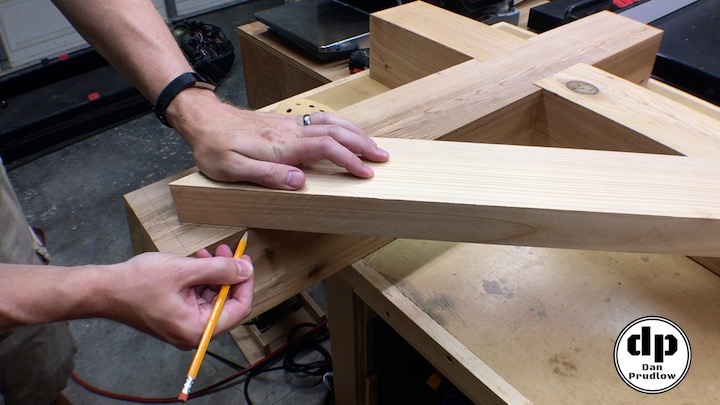
Breaking up the Plain Lines
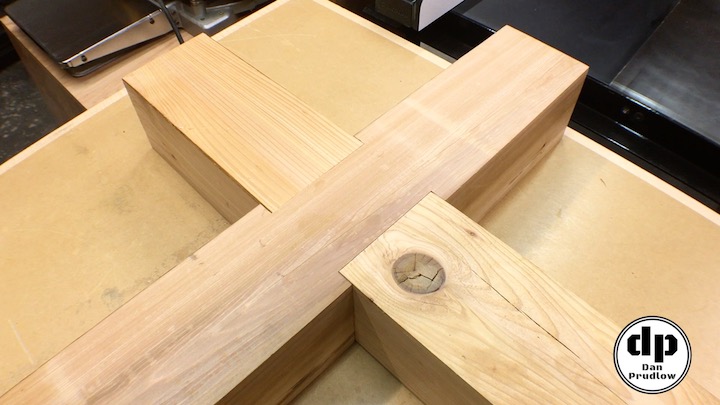
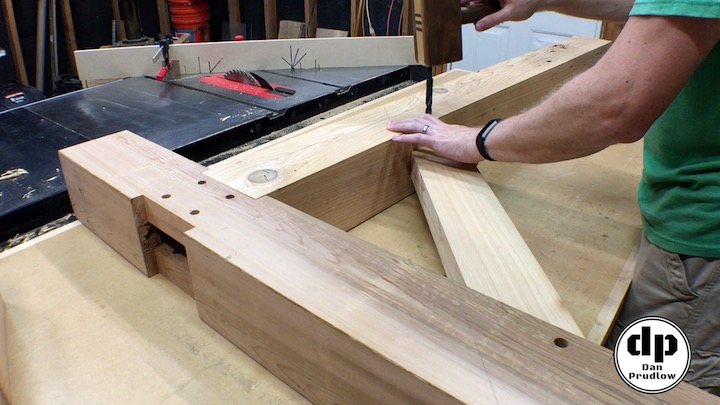
With both tenons fitting nicely I decided to give the joinery a little more visual interest by insetting the upper and lower post sections into the horizontal cross member. This was a fairly simple change to implement by marking each side of the post section and then using the table saw to cut away about 3/4 of an inch of material. I also had to trim the end of each tenon a bit so they two tenons did not hit each other. I did make a slight mistake here in that I cut the section just a little bit too wide so there is a little bit of a gap on either side of the post sections. Given this will be outside and likely get beat up by the elements over the years I’m not overly concerned about it.
Creating the Support Brace.
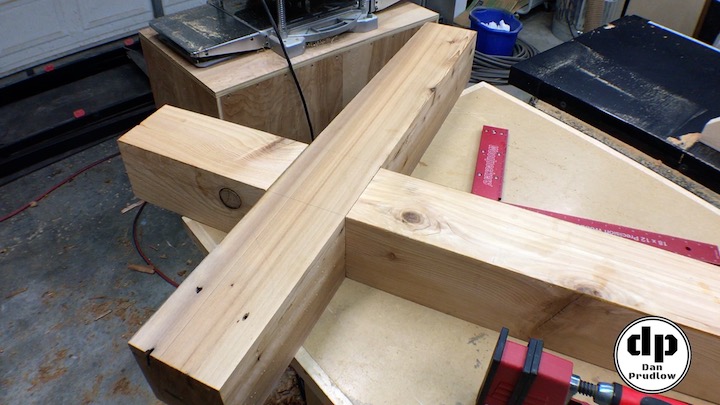
The next piece of the mailbox post is the diagonal support brace. I wanted this piece to be about half the thickness of the post parts so I split another section of post down the center and milled it down in the same manner as the other parts. Next I cut the piece close to it’s final length before starting on the joinery layout.
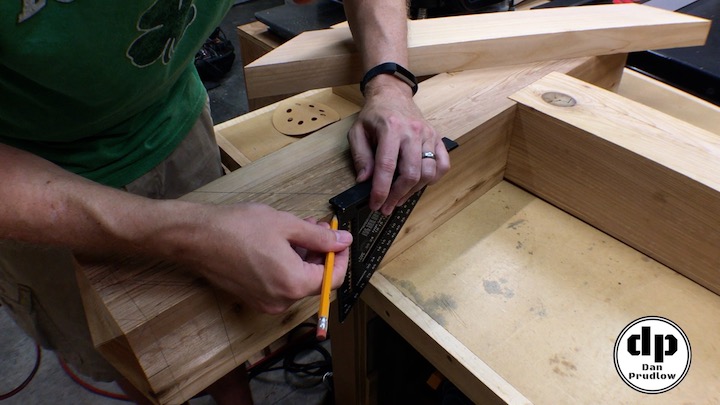
Joinery for the Brace
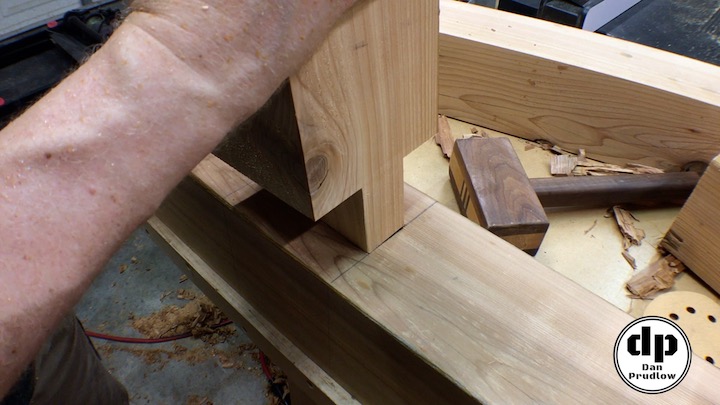
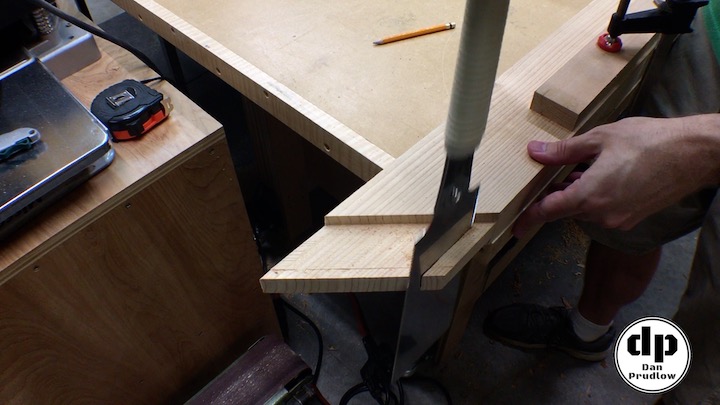
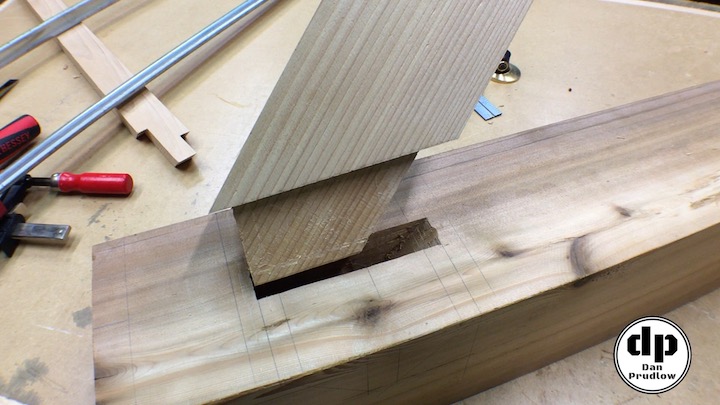
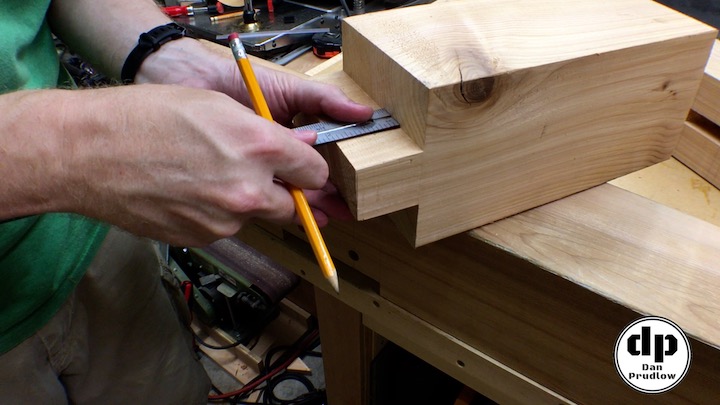
The joinery for the brace is also draw-bore mortise and tenon. Similar to the main post I started by laying out the mortises on both the lower post and the horizontal support. These mortises present an additional challenge in that the back of the mortise is cut at a 45 degree angle in order to accept the tenon. As before I started by marking the position of the mortise and then using a marking gauge and razor blade to score the lines. I used a spade bit to remove most of the material before moving on the the chisel work. I had never cut a mortise like this before so this was a new challenge and a great learning experience. Overall I think both turned out great…although I’ll never get to see them again after assembly!
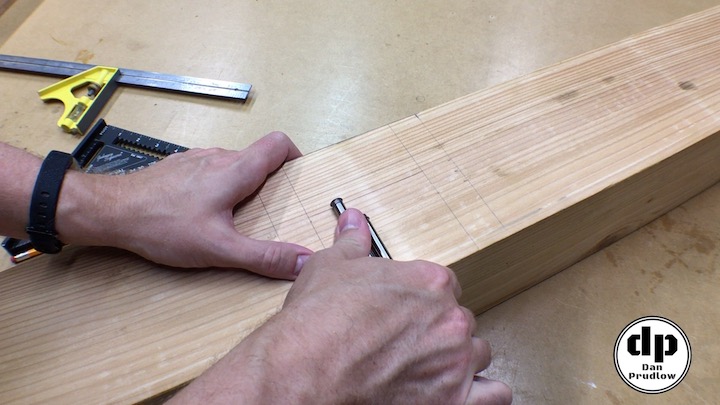
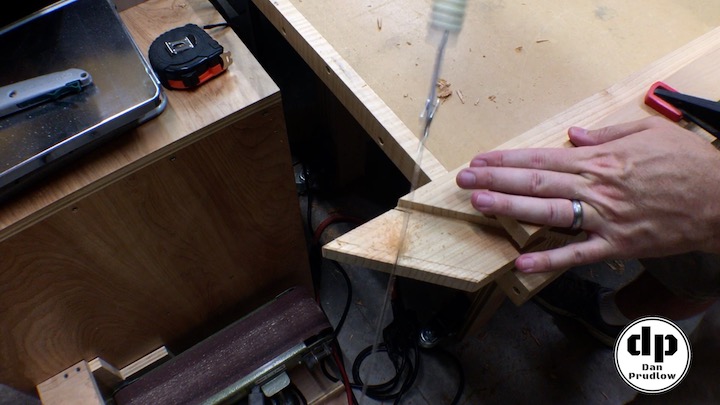
The tenons on the brace were cut using the same method I used for the post. I used the very end of the tenon to dial in the depth of cut for a snug fit and then proceeded to cut away each end of the brace until I had both tenons completed. Next I used a hand saw to trim the tenon to fit the shape of the previously cut mortise. Notice the back remains at 45 degrees while the front of the tenon is cut off square. A little bit of chisel work to clean up the shoulder of the tenon and the fit was better than I could have hoped for my first try at an angled mortise.
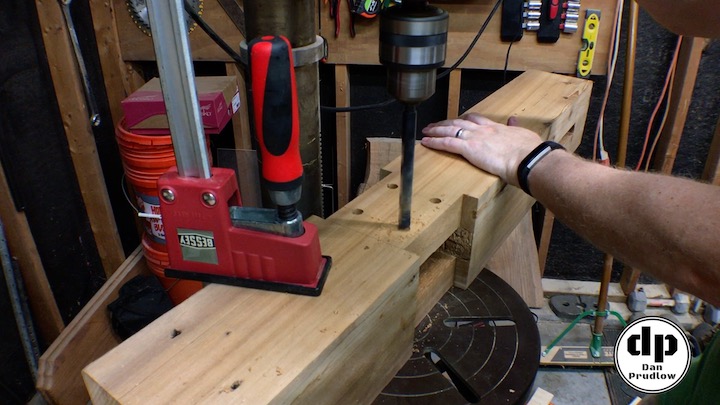
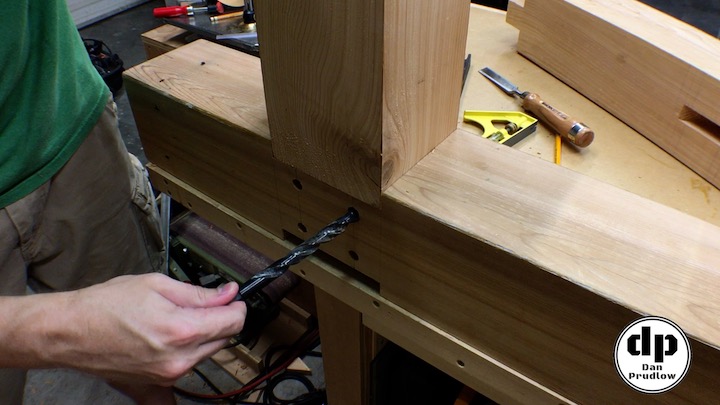
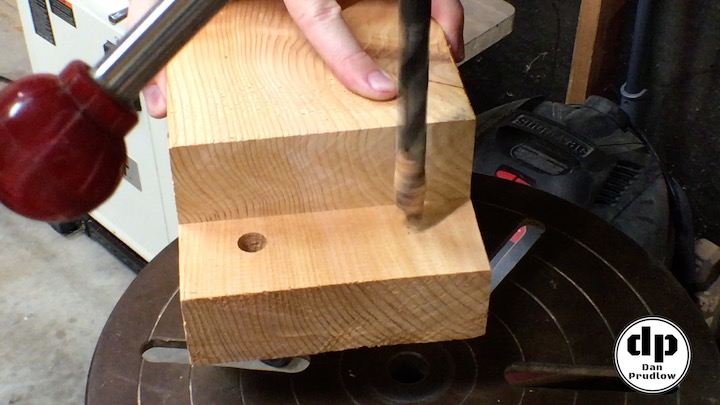
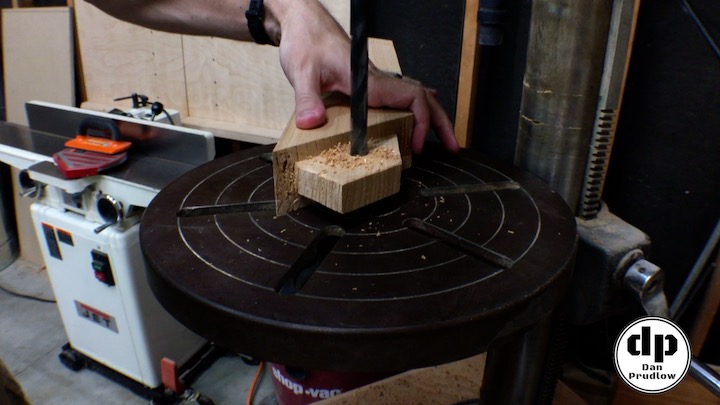
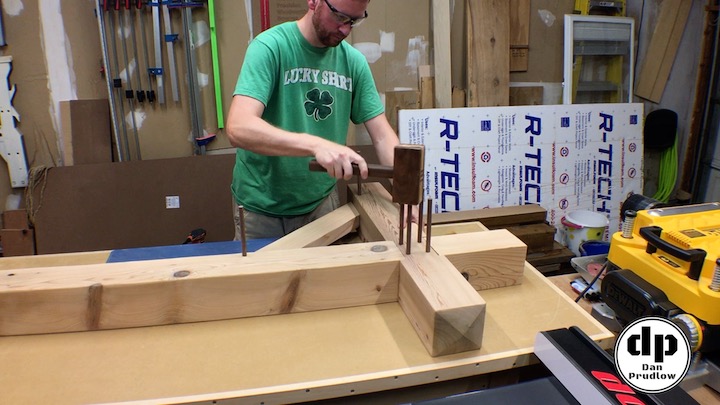
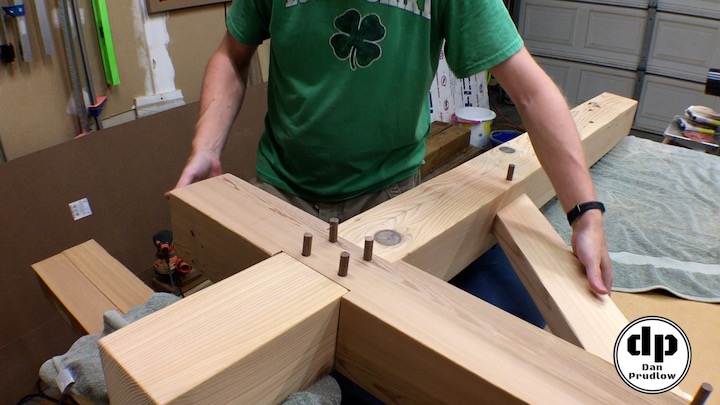
Drilling for the Draw-bore Pins
As I stated above the joinery is draw-bore mortise and tenon. In order to complete the joint I drilled a series of holes through the post parts using a 3/8 inch bit. With the holes drilled all the way through this will allow for a dowel pin to be driven through in order to pin the mortise in place. In order to achieve the draw-bore effect the holes in the tenons are marked and drilled about 1/16 of an inch closer to the tenon shoulder. When the dowels are driven in the offset hole will cause the tenon to be drawn in really tight. Because the joinery is pined so tight it is not necessary to add any glue or other mechanical fasteners such as screws, nails, or bolts. Not only is it rock solid but it looks great and there is no stress or mess with using glue!
Final Details and Sanding
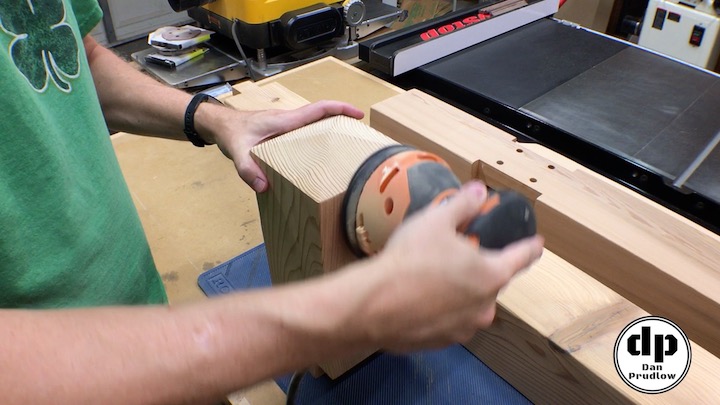
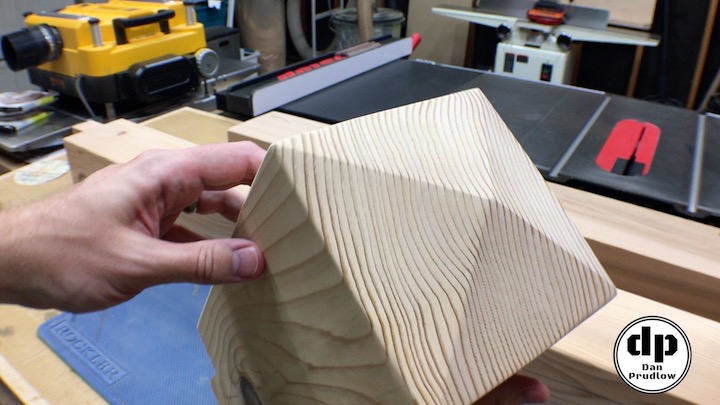
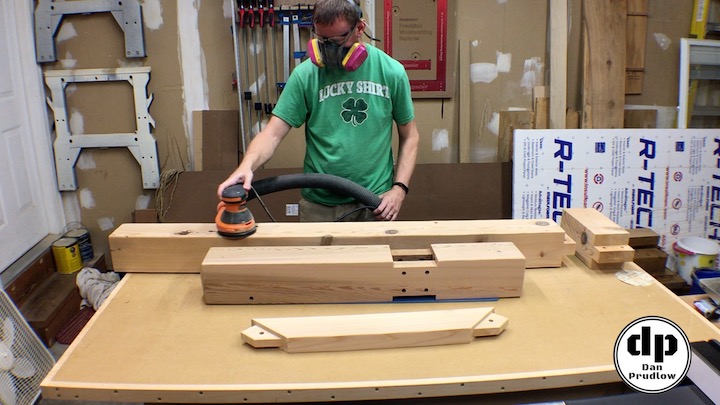
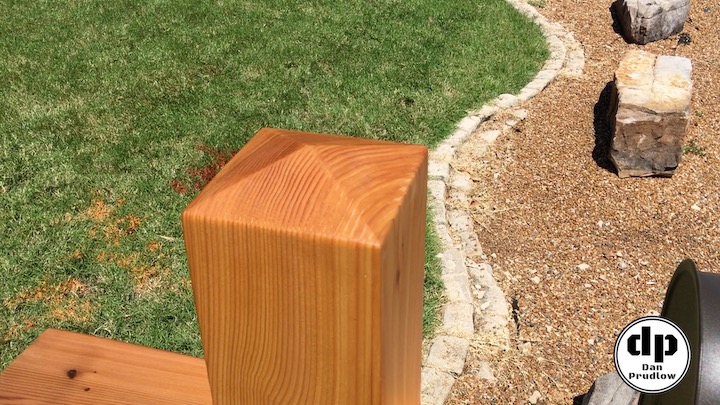
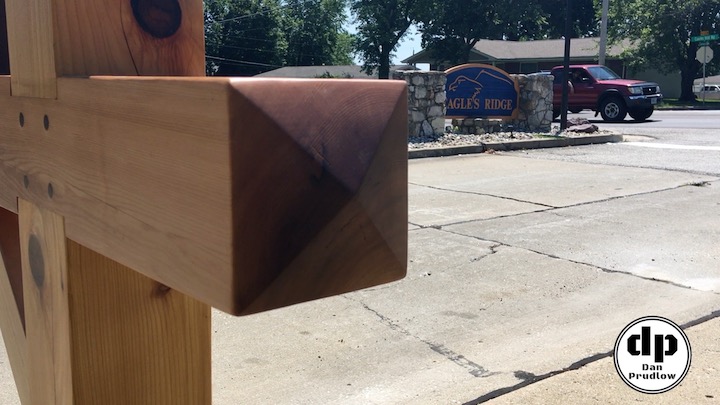
With all of the joinery complete the only thing left are some final details and sanding prior to assembly. On the top of the post as well as each end of the horizontal support I made angled cuts in order to create four facets that meet in the center. I then used the random orbit sander to ease over the edges to soften the look a bit. I then gave all of the parts a final sanding with 220 grit to smooth everything out and ease all of the sharp edges.
Assembling the Mailbox Post
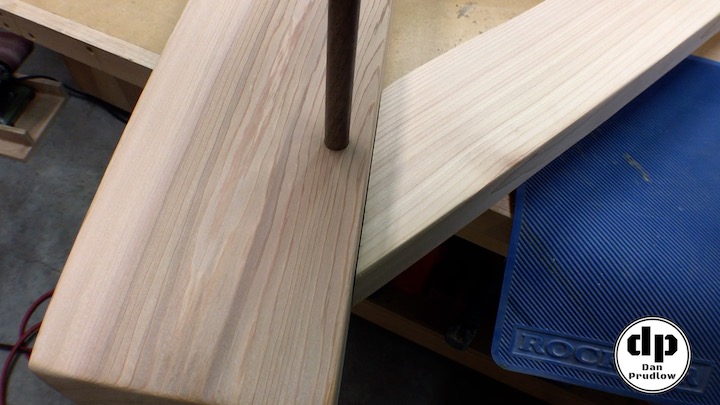
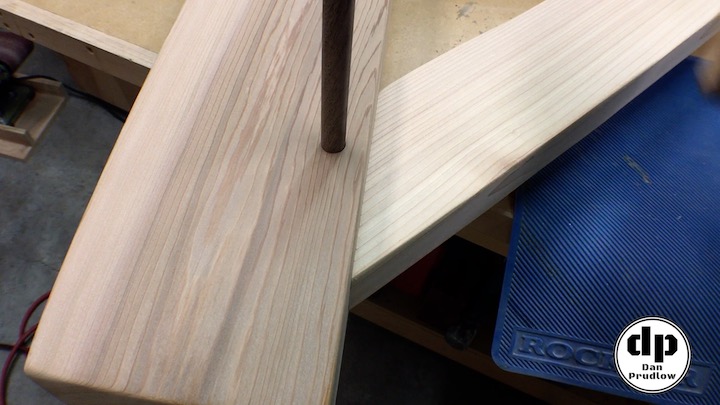
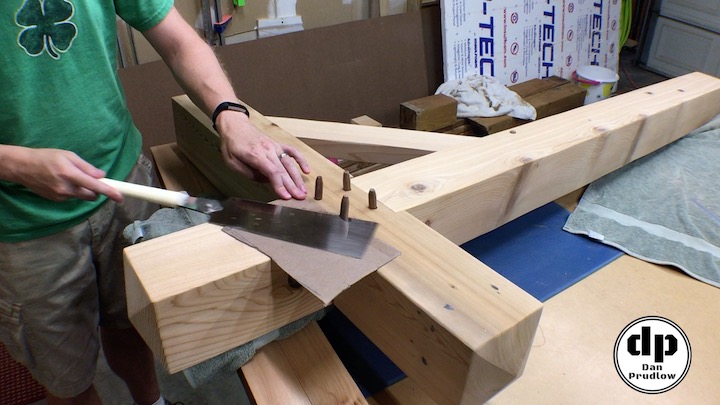
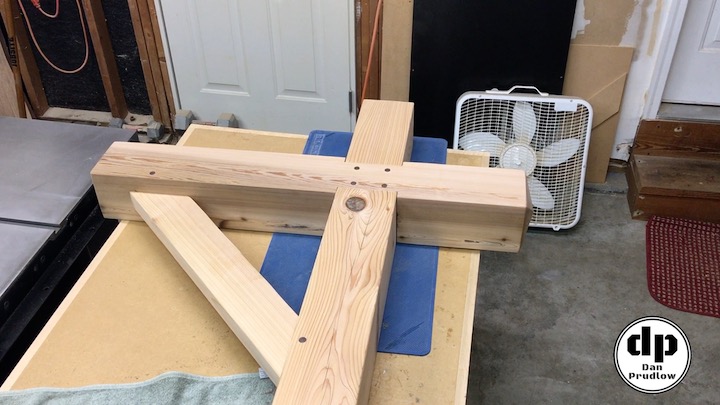
Everything is no ready to assemble and without the stress and mess of glue to deal with the process is pretty simple. I laid out all of the parts and then fit all of the tenons into the mortises. Next I started driving in the walnut dowel pins that will hold it all together. As the dowels are driven in the joinery pulls tight just as planned. The third and fourth pictures below show how the small gap is pulled closed by the dowel pin being driven through. Once all of the dowels are driven through I used a hand saw to cut off the excess length and then gave them a quick sanding to smooth everything out. At this point the assembly is complete.
Finishing
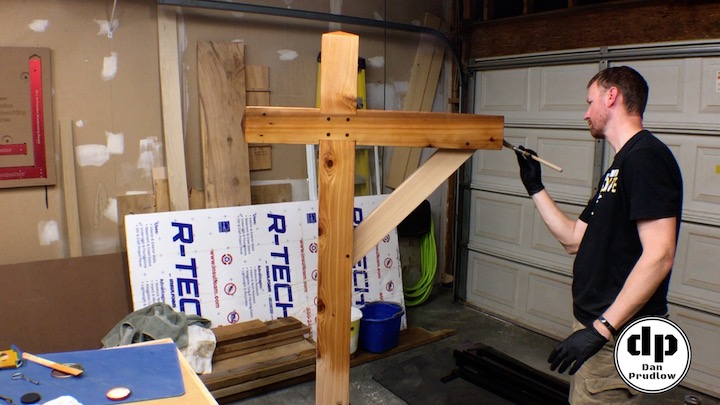
I chose to go with a spar urethane finish in order to really bring out the beauty of the cedar timbers. I started with the first coat straight out of the can. It went on pretty thick so I had to pay close attention to make sure there were not any big runs or globs of finish left on the surface. I coated the end grain a few times so it could really absorb as much as possible. I let the first coat cure overnight and then gave it a light sanding to smooth out any brush marks or other rough spots. For the remaining six or seven coats I thinned the finish down to about 50/50 with mineral spirits so the finish would wipe on thin using a rag and I would not have to worry about using a brush or the finish going on too thick.
Project Wrap Up
That wraps up the timber frame mailbox post project. This project involved a lot of firsts for me. First time using draw-bore mortise and tenon. First time cutting an angled mortise for the brace. And first time building something with no glue or mechanical fasteners. Overall I’m really happy with how this mailbox post turned out. The best part is that it’s on display at the end of my driveway so I get to see it every day!
If you have any questions or comments leave them in the comments section below. You can also find me on Twitter and Instagram or you can send me a message via the contact page. Also, please be sure to get subscribed to my YouTube channel so you don’t miss any future builds!
You can find links to many of the tools, accessories, and finish products I use in my shop over on my Tools & Resourcespage.