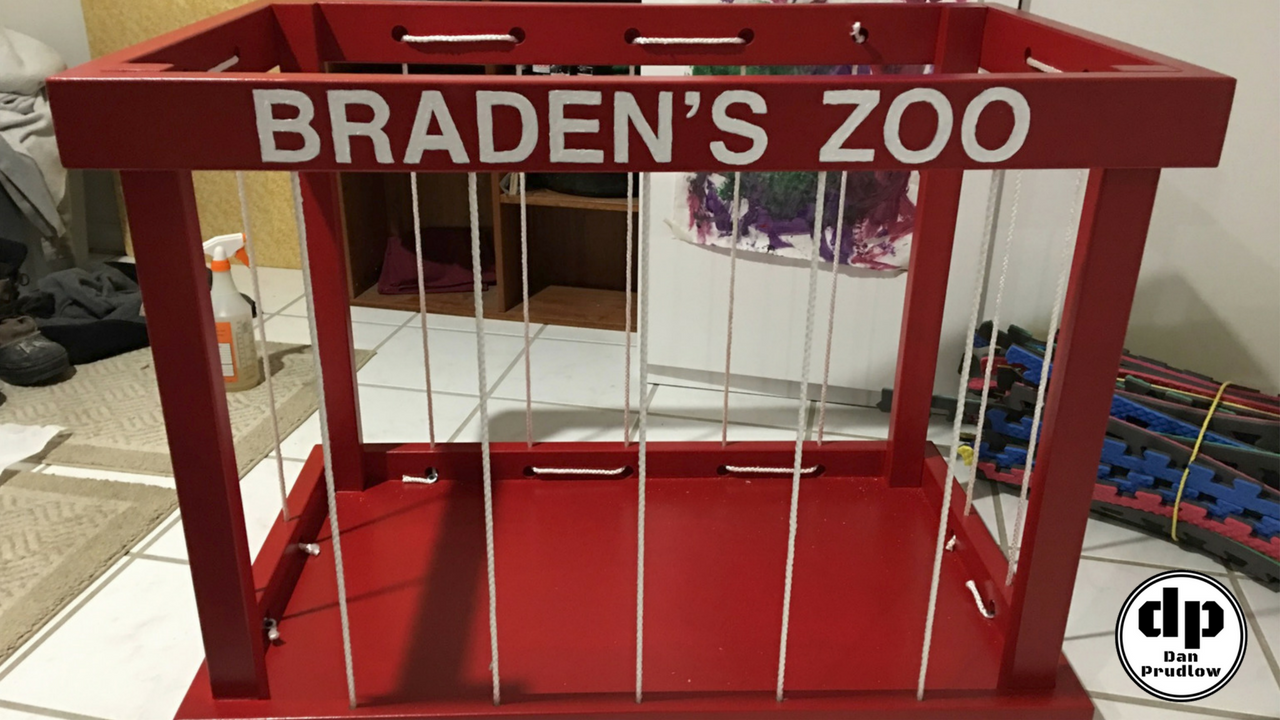
Stuffed Animal Storage – Building a Stuffed Animal Zoo
Stuffed Animal Storage
Let’s face it, stuffed animals can be a real pain to keep organized. They usually end up either in a big pile in a corner or laying all over the house. There are various stuffed animal storage solutions out there such as nets that hang in the corner of a room. I’ve also seen them lined up on bookshelves or piled on beds. While these things can work they are not always practical. If they are in a net up off the floor your kids might not be able to reach them. It may be fun to have them on the bed but then you have to move them every night at bedtime and put them back in the morning…no thanks!
A Simple Solution
This stuffed animal storage “zoo” is a really simple solution that doesn’t require any fancy joinery or hardwood lumber, although you could go that route if that is the look you are going for. In my case I knew it was going to be painted and that my nephew’s name would be painted on as well so I went with inexpensive dimensional lumber from the home center.
Project Materials
For this stuffed animal storage zoo I used one 8 foot 2×10, one 8 foot 2×12 and a few leftover pieces from another project as well as a 2 foot by 4 foot MDF project panel that was 1/4 inch thick. Including the rope, screws, and other miscellaneous materials the entire project was probably $40-$50. You could just buy 2×4 studs but those usually have a lot more knots and other defects to work around. By using the wider material you can usually find boards with nice straight grain and minimal knots…you just have to be willing to dig through the pile a bit. Ultimately you end up with a little more waste but spend a lot less time filling defects and sanding things smooth.
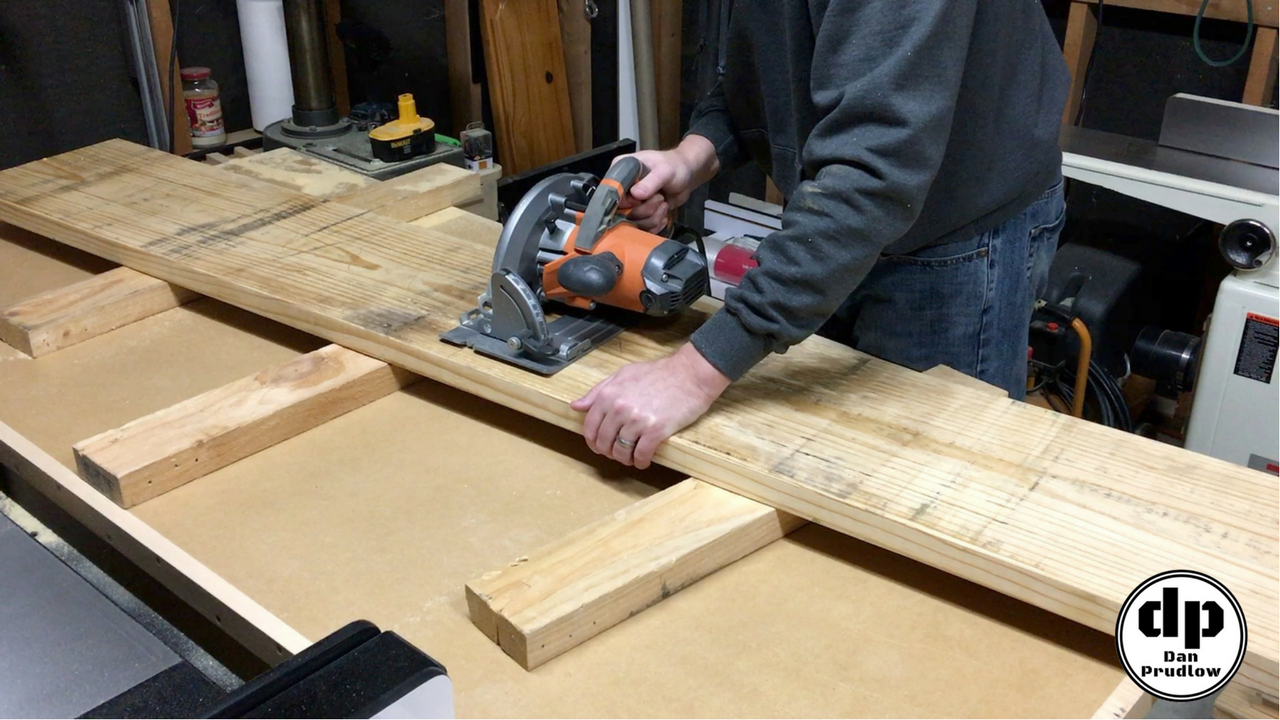
I started by breaking down the larger boards into shorter, more manageable pieces. Construction lumber is not always very straight and breaking things down will usually result in flatter pieces to send through the table saw later. This also gives the opportunity to cut around any significant defects in the lumber such as knots or cracks. I used a circular saw but a miter saw or jig saw would work just as well if not better.
Further Breakdown of Material
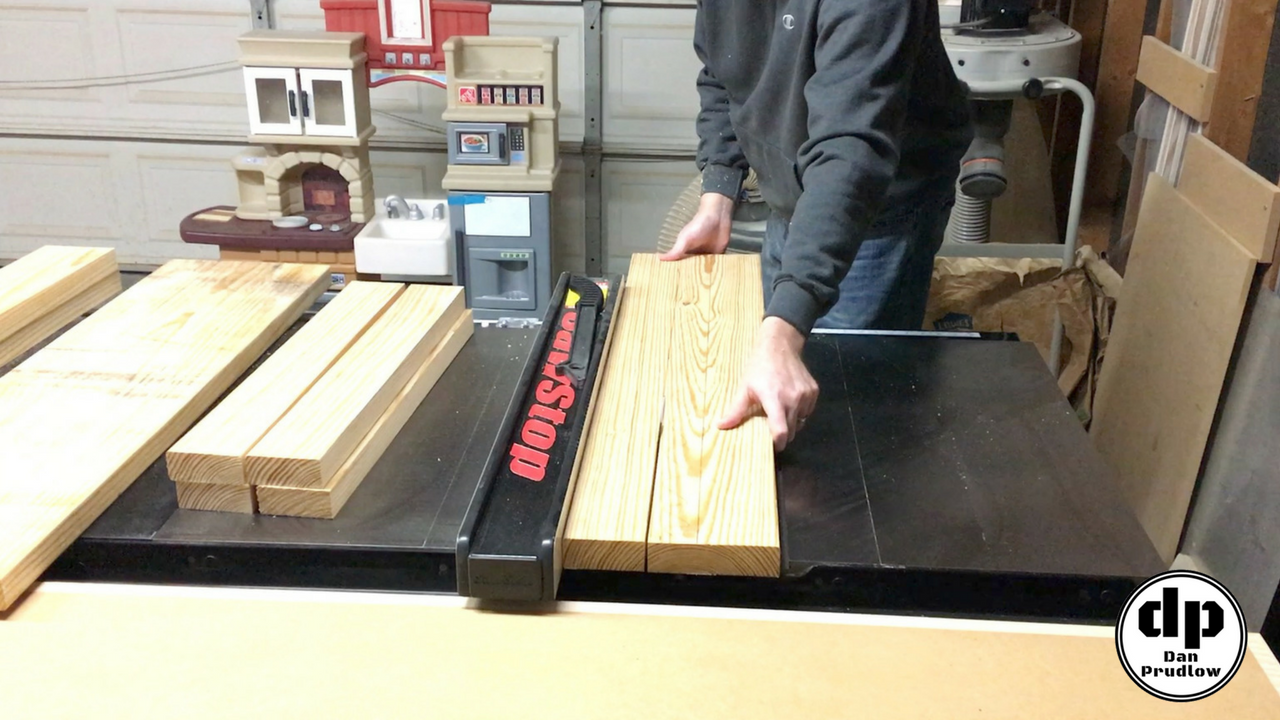
Next, I took everything over to the table saw to break things down further. At this point my parts are still rough dimensioned because I’m going to run them over the jointer and through the planer to get everything nice and square before assembly. The jointer and planner are optional of course as you could just use the table saw to break down the parts to final width. My goal for this pass through the table saw was just to get everything down to manageable size and close to the final dimension. This is the point where you might find that some of your lumber has some internal stress and starts to bend or bow as you are making the cuts so you need to pay attention and shut the saw down if anything starts to bind up on you.
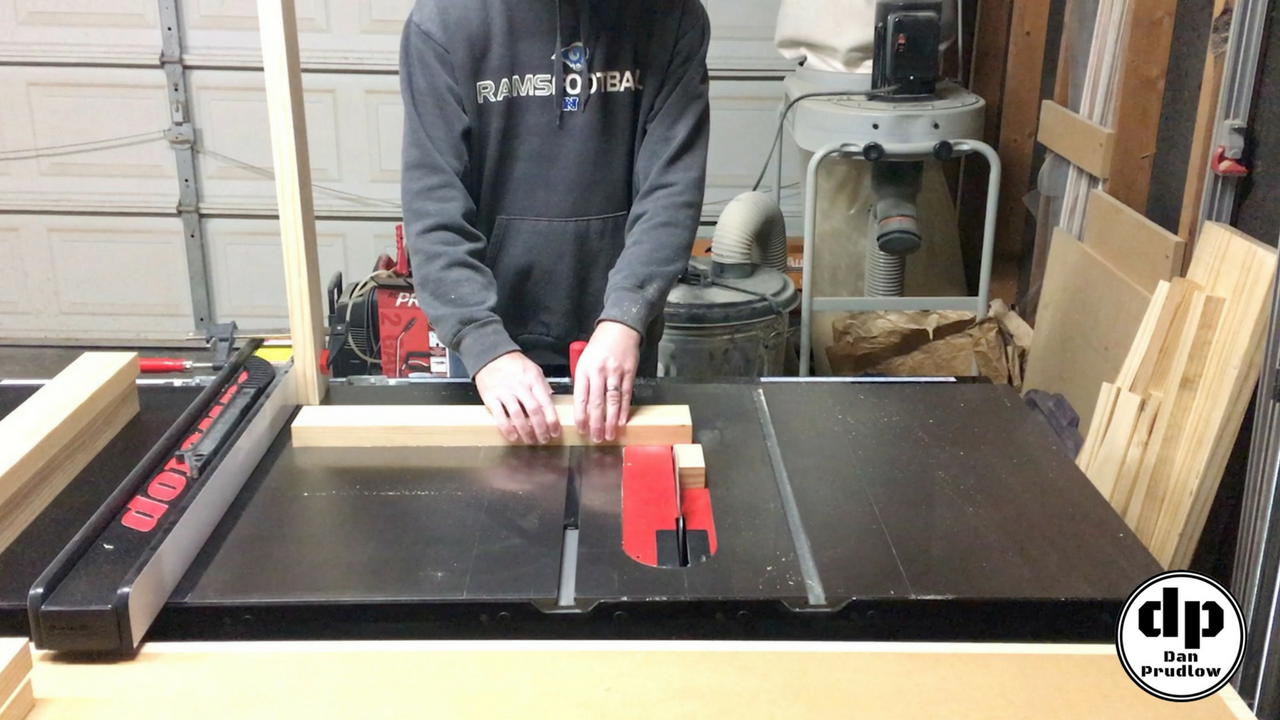
After jointing and planning all the parts down to their final thickness I moved back to the table saw to rip everything down to final width. I then set up a stop block on my table saw fence and trimmed each piece to final length. I first square off one end and then flip the piece end for end and push it against the stop block to set the length and make the cut. You always want to use a stop block or crosscut sled when crosscutting so that your workpiece doesn’t bind between the blade and fence and cause a kickback.
Drilling Holes for the Rope
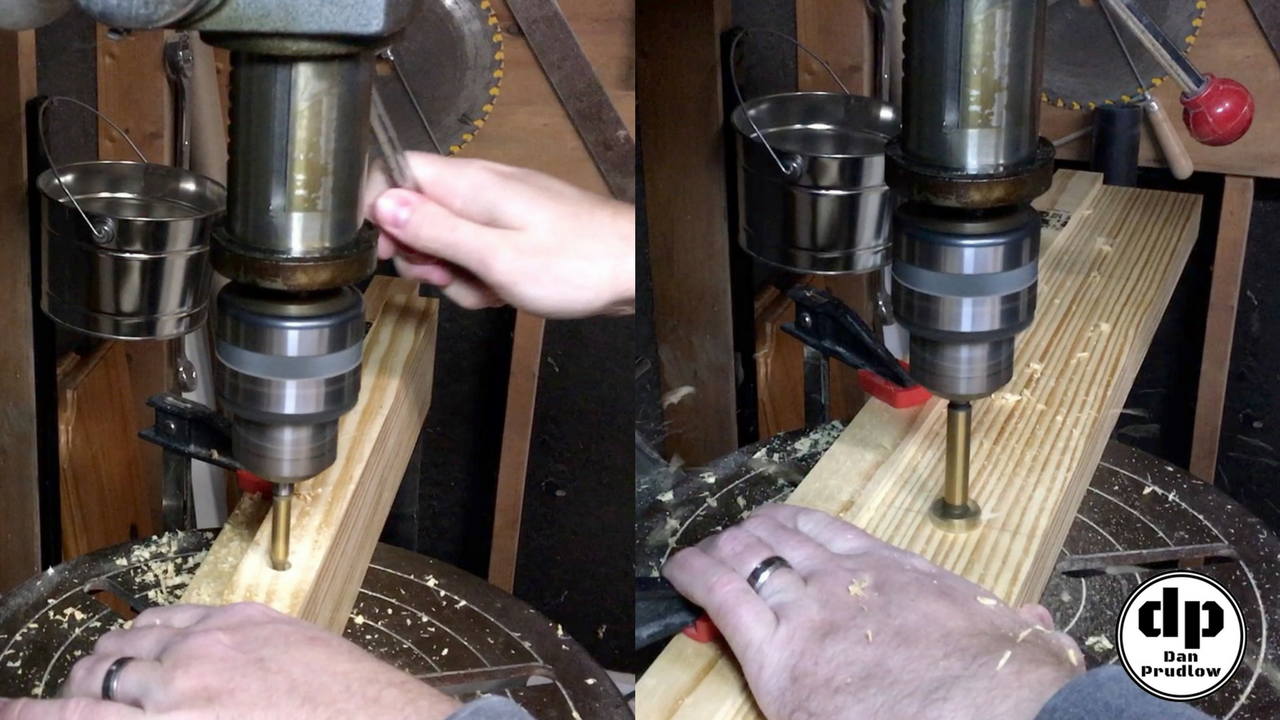
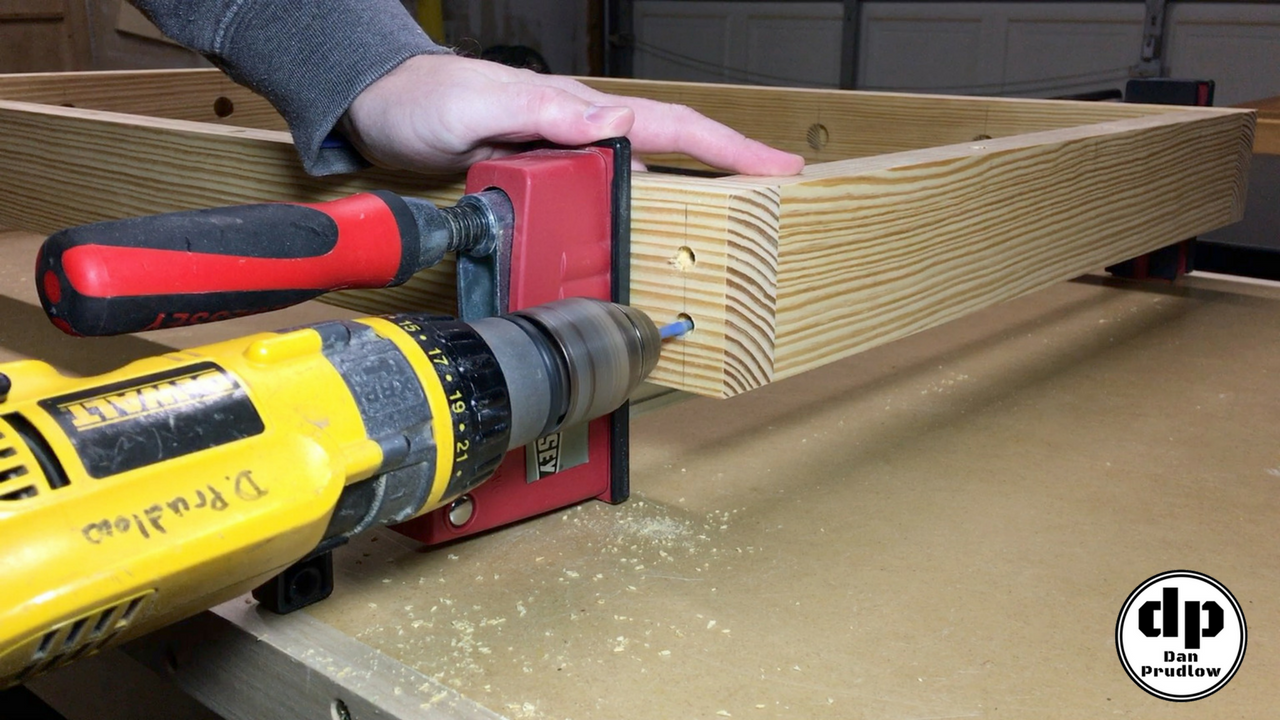
Now that we have all of our parts cut we’re ready to drill holes for the rope. You can space the rope to your liking, for my stuffed animal storage zoo I think they ended up every 5 or 6 inches. I used two forstner bits to drill the holes. First, I drilled down into the edge of the board to a depth a little more than half way through the thickness. Next, I used a larger bit to drill into the face of the piece until I crossed into the path of the smaller hold. This provides a spot for the rope to pass through in order to tie it off in a knot. Once the animals are piled in the knots won’t be visible so you get a nice clean look.
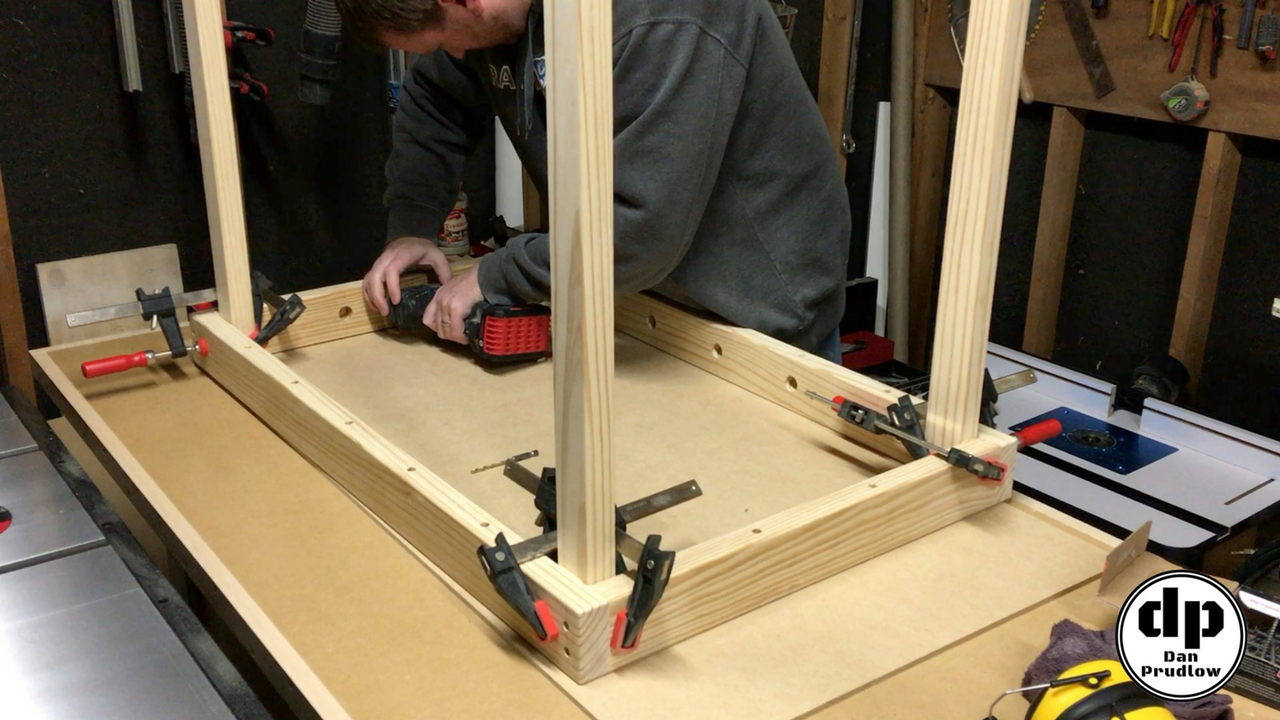
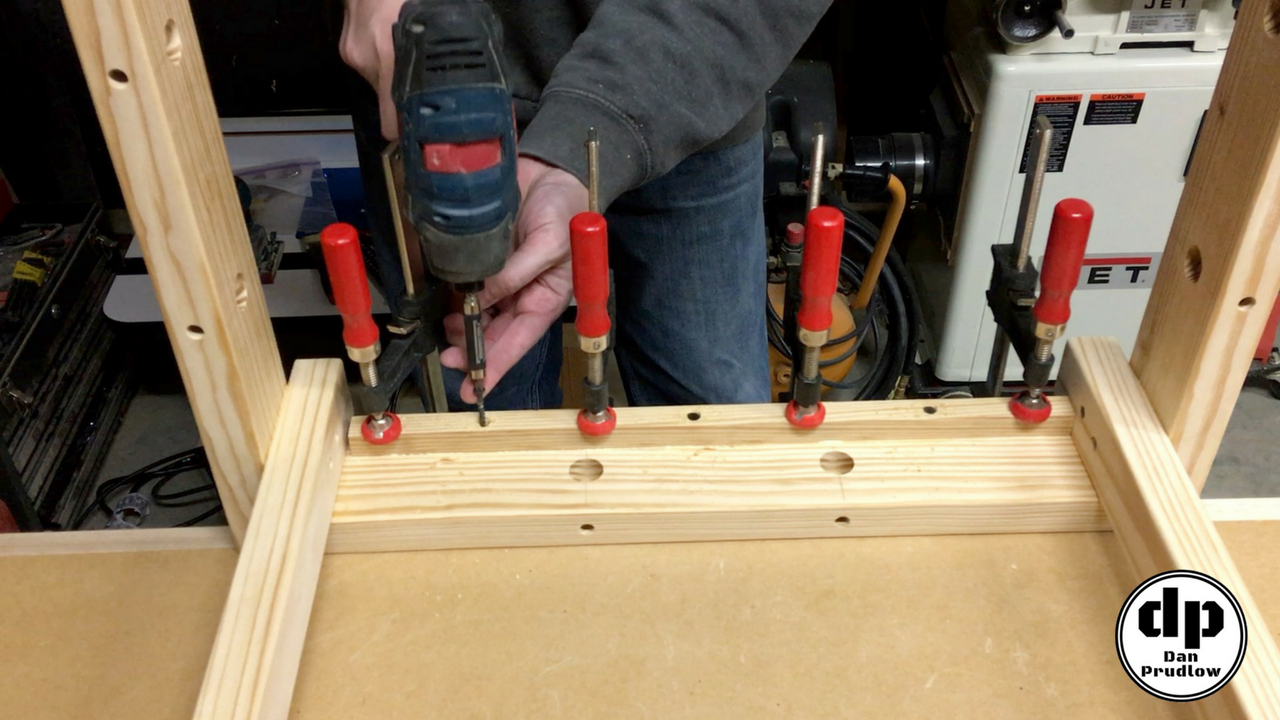
Starting Assembly
I gave everything a good sanding off camera and now we are ready for assembly. Nothing fancy here just simple butt joints with glue and 2 1/2 inch screws to hold everything nice and tight. Make sure you pre-drill all of your holes to avoid splitting as you drive screws into the end grain. I also counter sunk all the screws and later filled the holes with wood filler to completely hide the fasteners.
Prior to adding the vertical supports I rounded over all of the edges with a 1/8th inch round-over bit in the router. For assembly of the vertical supports I also just used screws and glue. I supported the base about an inch and a half off the bench when attaching the vertical supports to give a little more visual appeal and create the feet the piece will sit on. For the top I attached it flush with the top of the vertical supports as shown below.
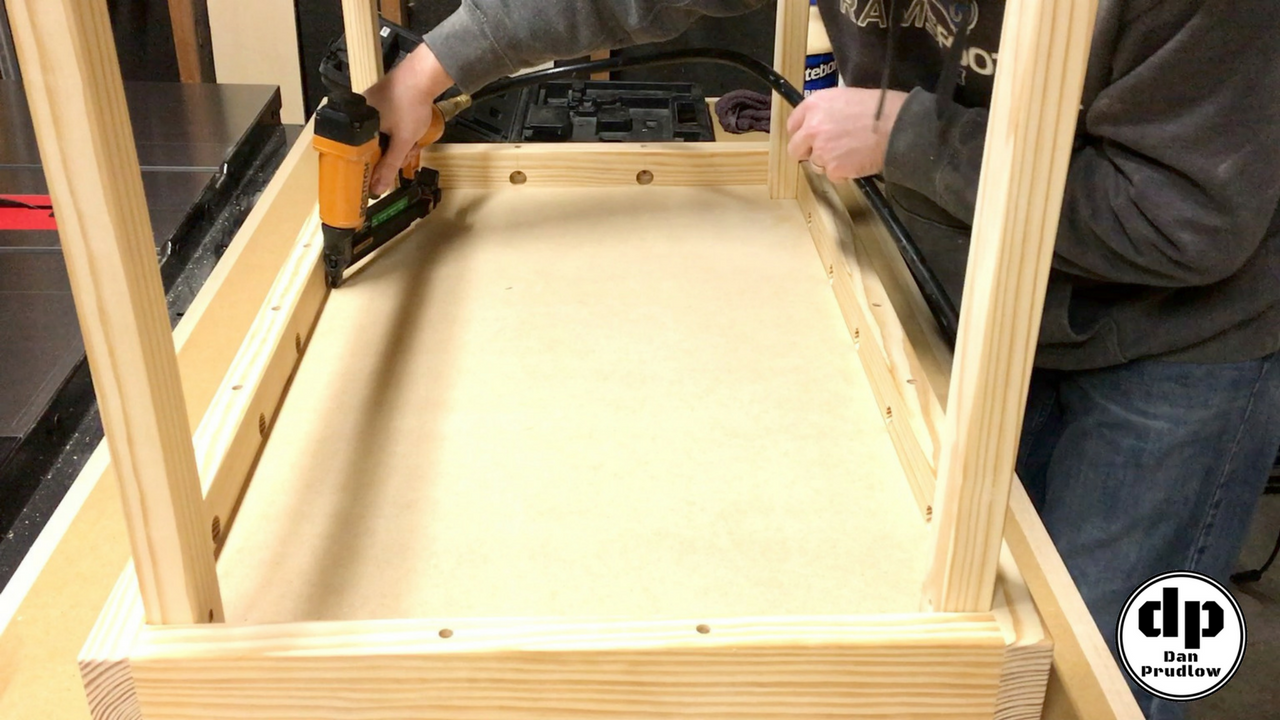
Adding the Bottom Panel
To support the 1/4 inch MDF bottom panel I used some scrap pieces to create 3/4 in cleats and attached them all around the base with glue and screws.
Finally I cut the MDF panel to size and notched out the four corners then glued and nailed it in place with some 1 inch brads.
Attaching the Rope
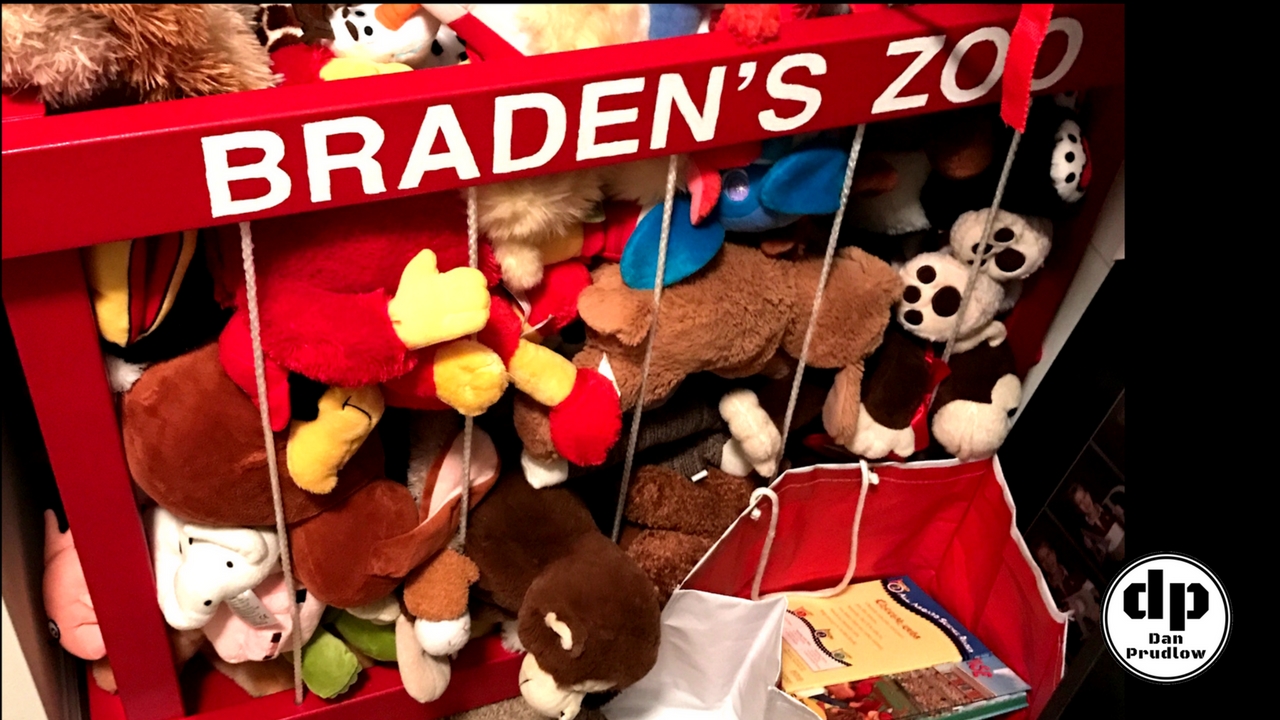
I lost the footage of painting and adding the rope but as you can see from the picture below I ended up looping the rope through the holes and only tied a knot at each end. I also added some 5 minute epoxy and a screw with a small washer on top of each knot. This helped to pull the rope a little tighter and the epoxy will ensure the rope does not fray and rip out from around the screw as animals are pulled out between the ropes over the years.
That’s a Wrap!
I hope you enjoyed this stuffed animal storage build. This was my first YouTube video build and I had a lot of fun with both the build itself and making the video.
If you have any questions or comments leave them in the comments section below. You can also find me on Twitter and Instagram or you can send me a message via the contact page. Also, please be sure to get subscribed to my YouTube channel so you don’t miss any future builds!
You can find links to many of the tools, accessories, and finish products I use in my shop over on my Tools & Resourcespage.