When I bought my SawStop table saw it was delivered on a small pallet and I knew I should probably try to do some sort of pallet wood project rather than just cutting it up and burning it or throwing it in the trash. I started to try to pry the pallet apart and man alive what an ordeal that was. I spent about 10 minutes on one board before I said the heck with it and just used my circular saw to cut the small sections of the slats out to keep and I sent the rest to the scrap pile. For all those folks out there breaking down pallets for pallet wood projects on a regular basis I commend you for your efforts…it’s just not for me!
No Specific Plan
The small pieces I had kept sat in my shop for quite a while until I finally decided to make something with them. I didn’t have a specific plan in mind for this pallet wood project…just a general idea for some sort of organizer for pens/pencils/etc.
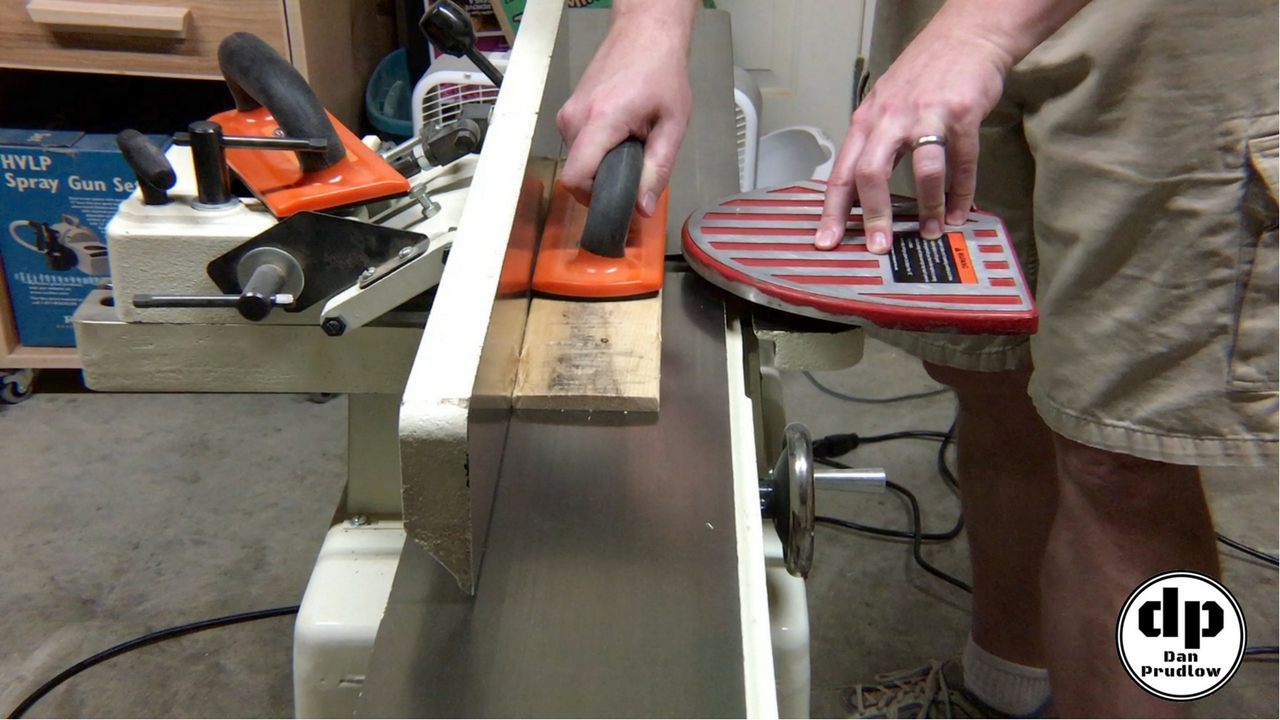
The boards were two different thicknesses and the thinner ones had a slight cup in the middle so the first step was to pass them over the jointer to flatten one side. I checked over the thicker boards and jointed one side of most of those too as they were not very flat either.
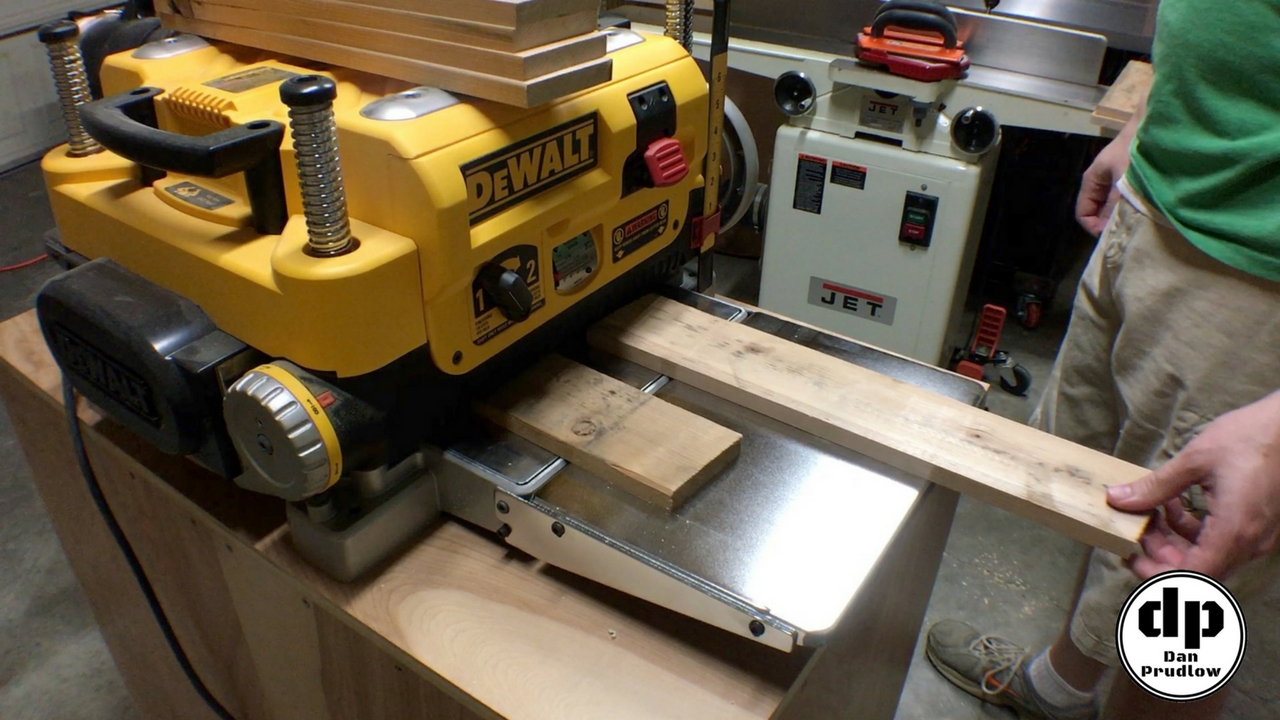
Next, I sent all of the stock through the planner to get everything flat on two sides so I would have nice surfaces for gluing. I’m not sure that jointing and planing are typical operations for a pallet wood project but in my case I needed to do a little work before I could use the stock.
First Design Decision and Glue Up
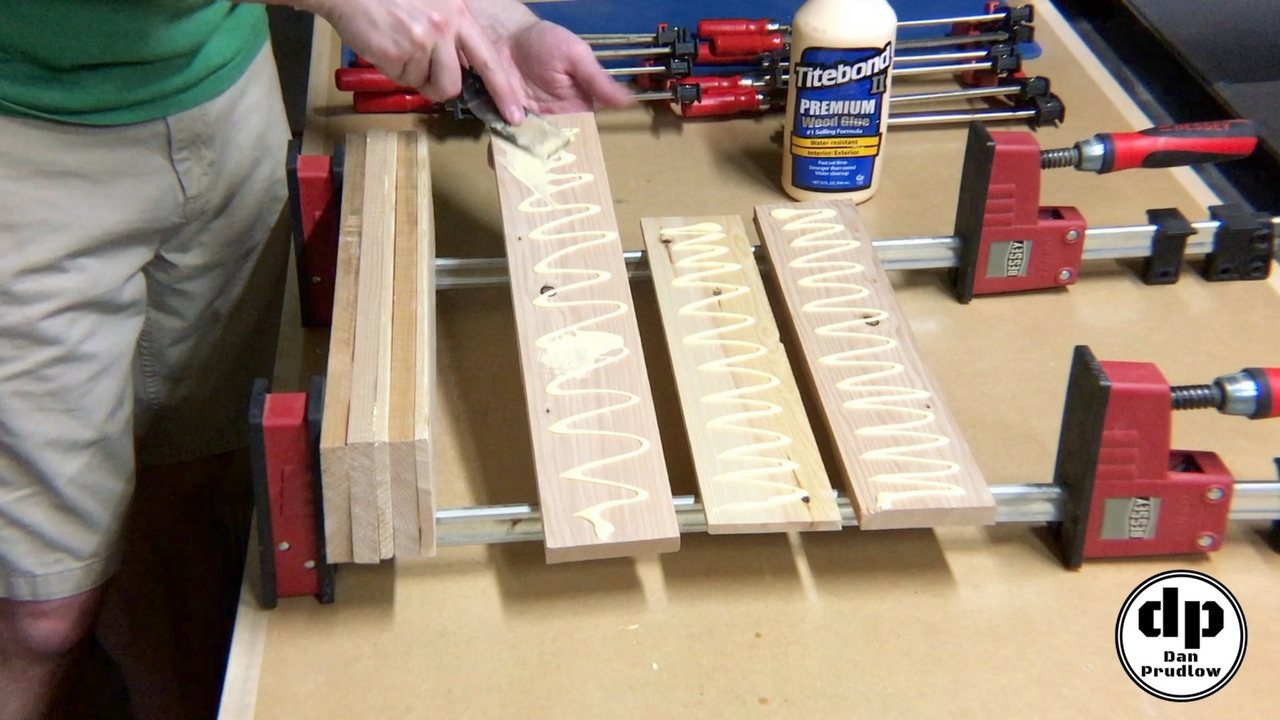
Since the stock was two different thicknesses and two different types of wood I thought it would look neat to glue them together in alternating thickness/wood type. I separated things out and made two stacks. Each one had a doubled up section of the thicker stock on once side but I ended up cutting that off later.
The glue up was pretty basic. I added a good amount of glue and spread it around to the edges of the boards and then stacked them in order and added clamps and set them aside to dry overnight.
Cleaning Up the Big Blocks
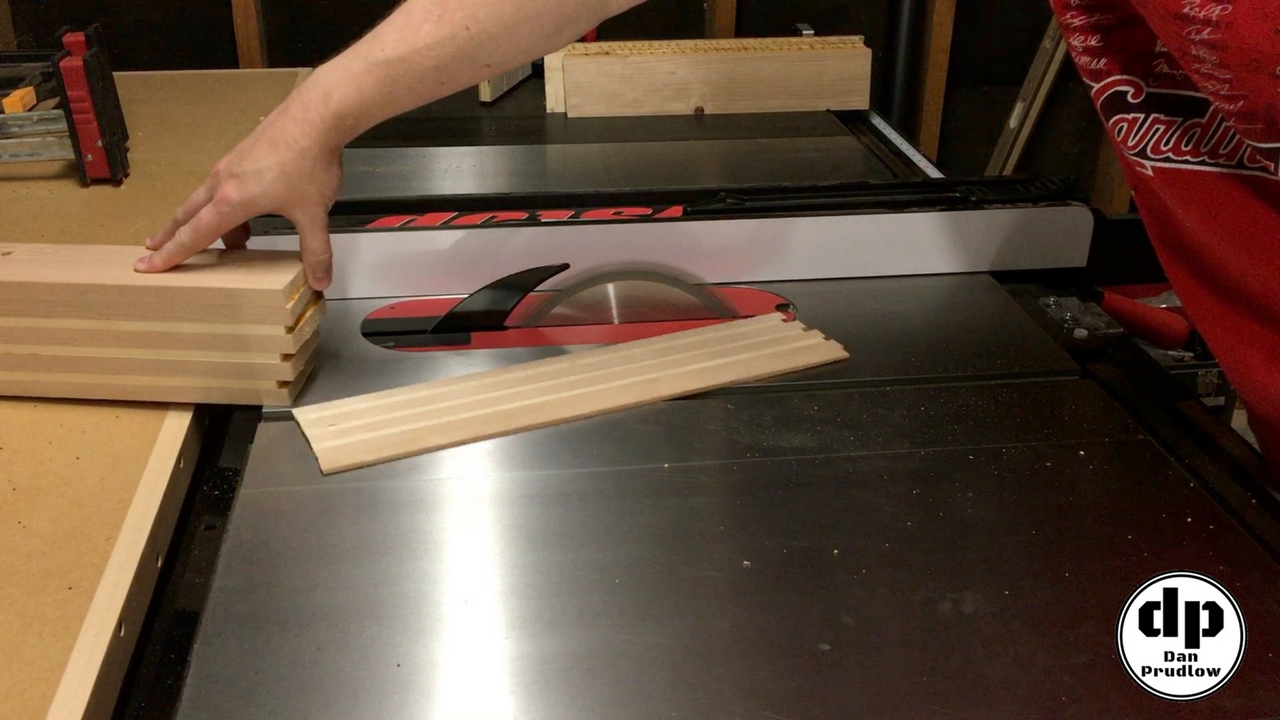
After the glue had dried I took the two blocks out of the clamps and used a scraper to knock off as much of the glue squeeze out as possible. I them took them over to the jointer to clean up one face so there would be a good reference face for the table saw.
Back at the table saw I cleaned up the other side using two passes, flipping the piece end for end in order to cut the other side. The blade is not tall enough to cut through the entire piece in one pass so I raised the blade to a little more than half the thickness and made the cut in two passes.
Second Design Decision
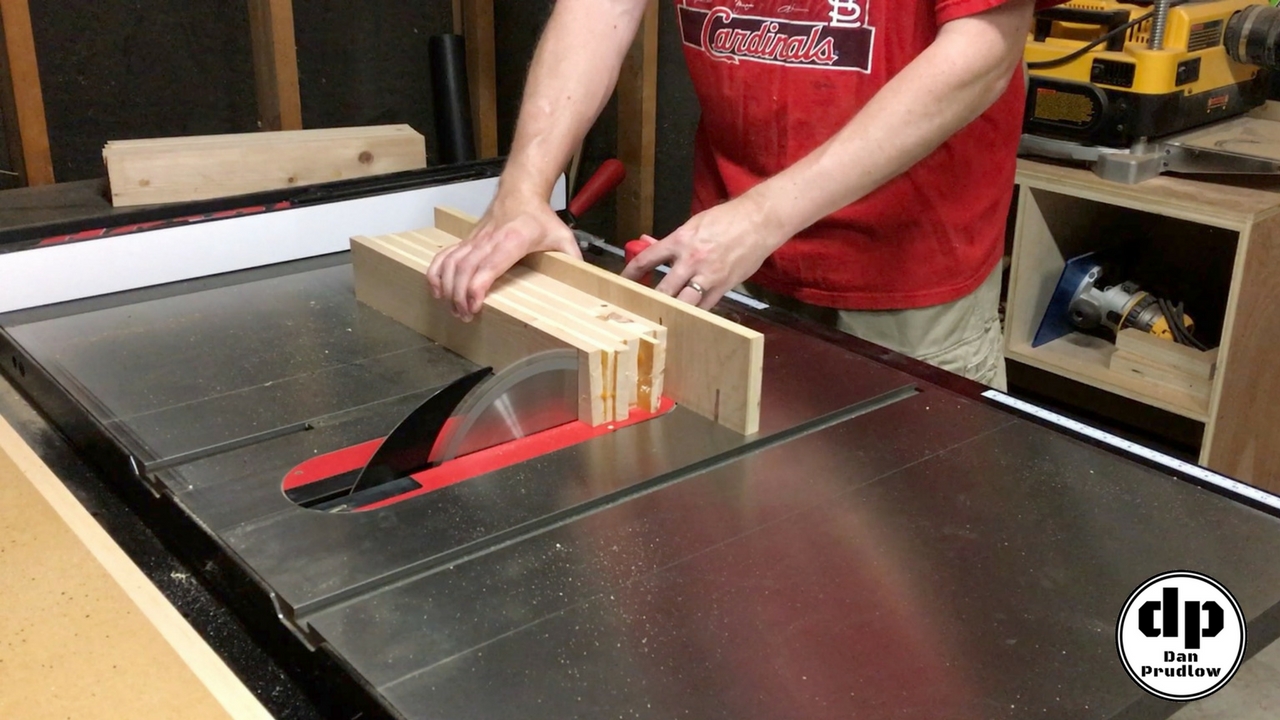
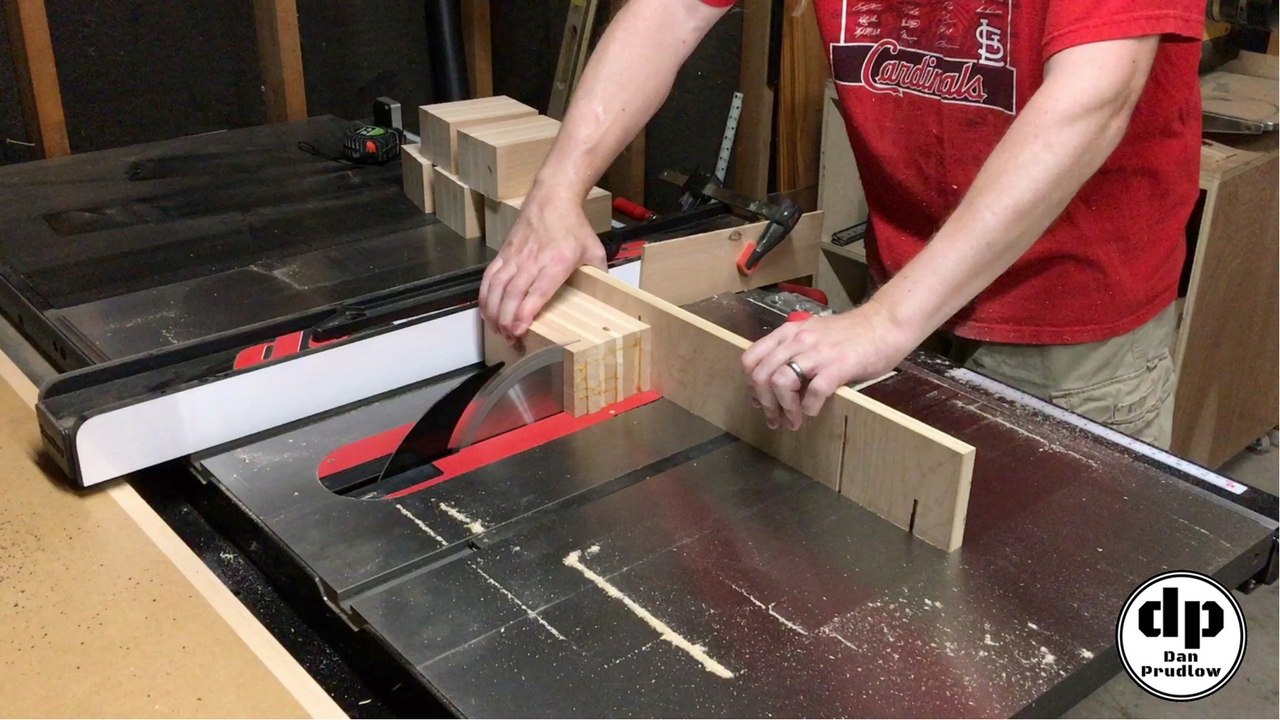
Next I used the miter gauge with a sacrificial fence to clean up one end and then cut each larger block into smaller blocks of equal length.
More Design on the Fly
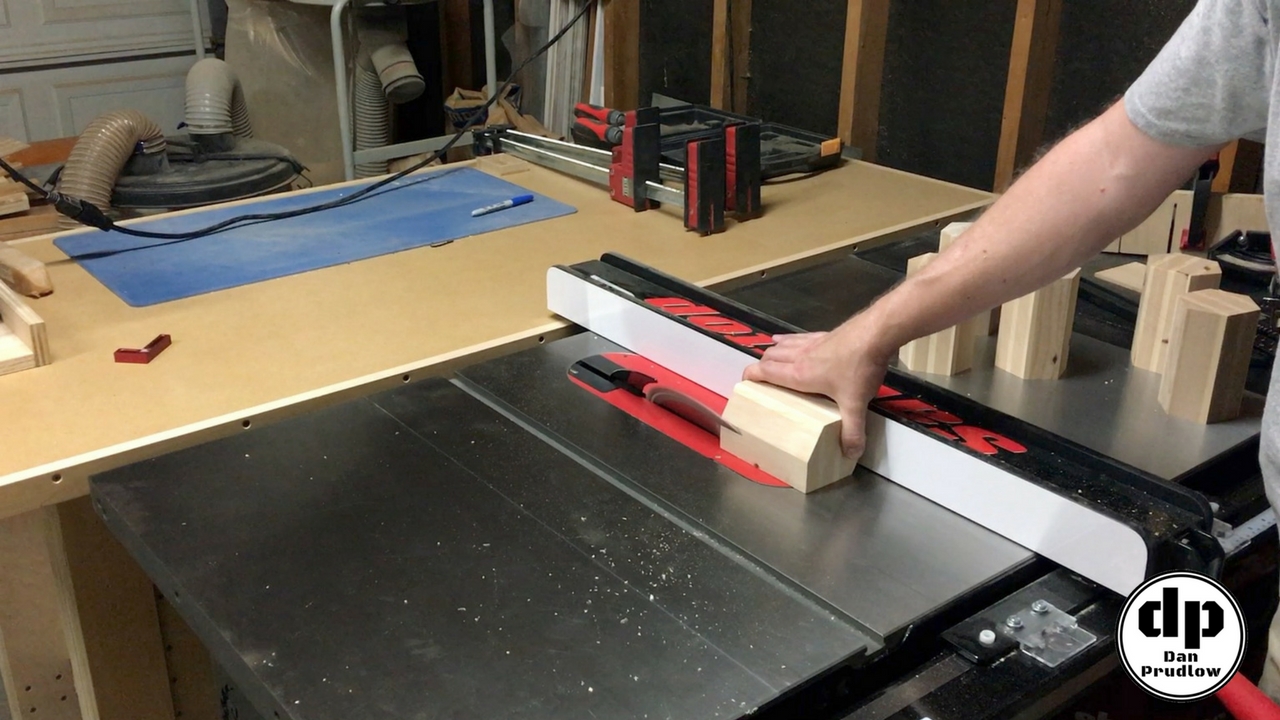
This is the point in the project where I decided to make the six sided shapes that you see in the final product. I tilted the saw blade to 30 degrees which leaves the cut on each piece at 60 degrees. I made two cuts on each side of the six blocks.
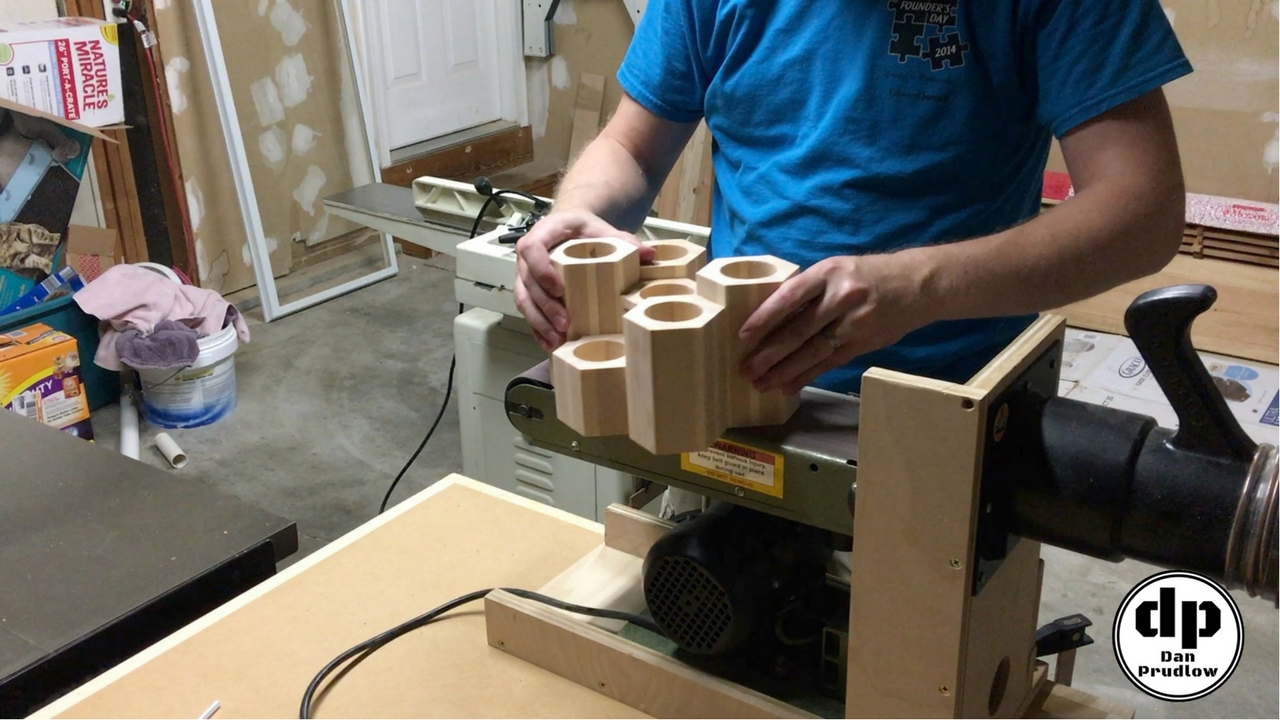
With all the cuts made I gave them all a light pass at the belt sander to clean up any saw marks and get them ready for the next step.
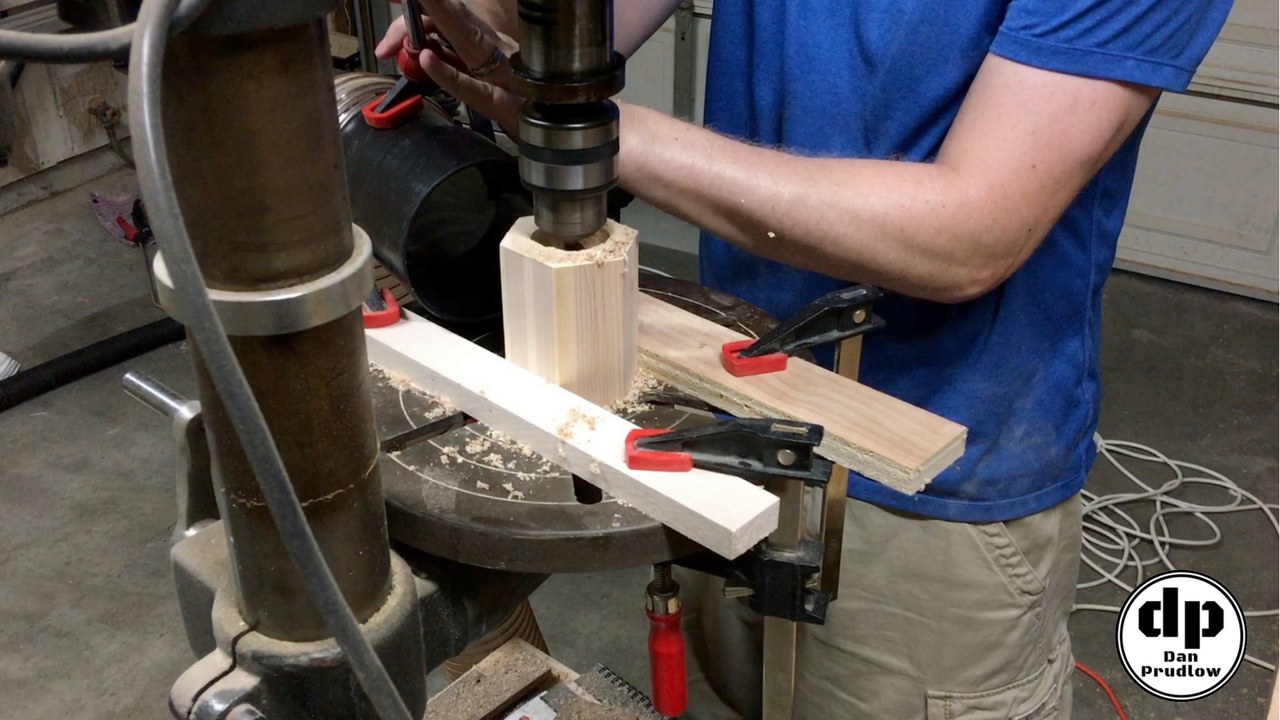
Boring Deep Holes
I cut the blocks to various lengths and then took them over to the drill press to bore the holes that would eventually hold pens, pencils, and such. Next I marked the center of each block and then used a 2 inch forstner bit to bore down into each one. It’s a good idea to set the drill press to stop about an inch or so from the bottom as to not bore all the way through. I also rigged up my 4 inch dust collection hose right on the drill press table and it did a great job of collecting a lot of the dust and chips from these holes.
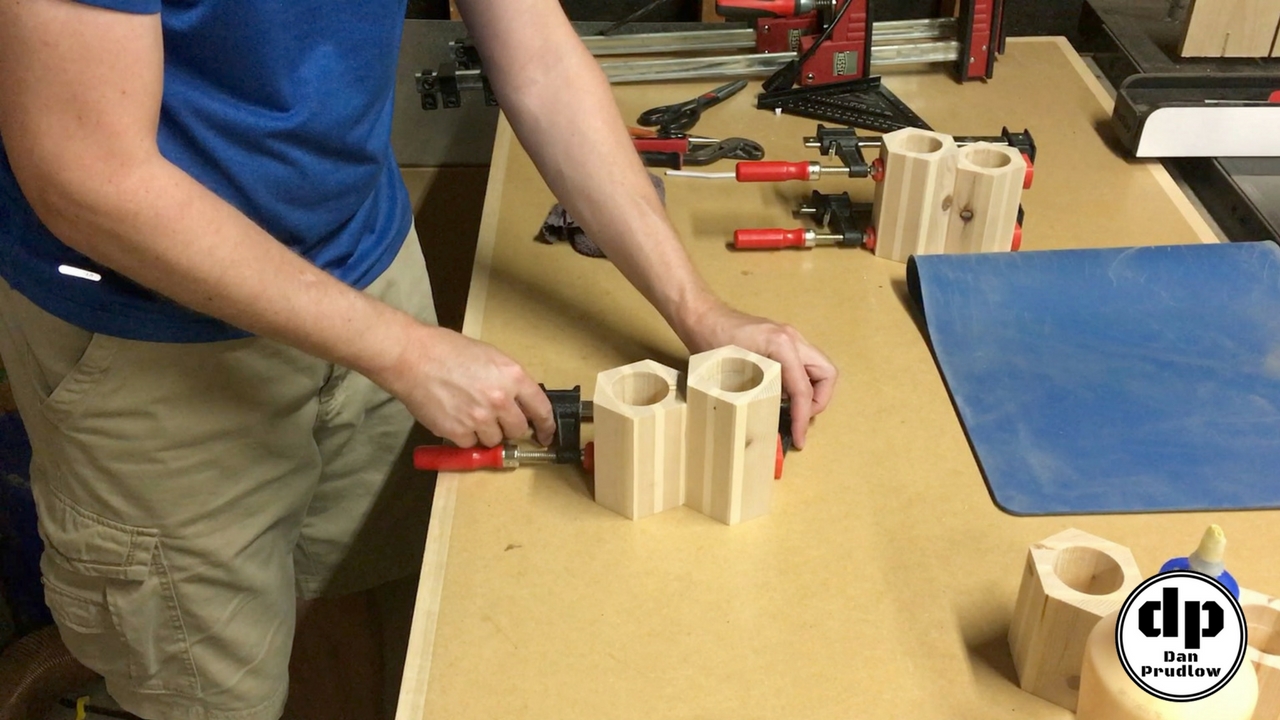
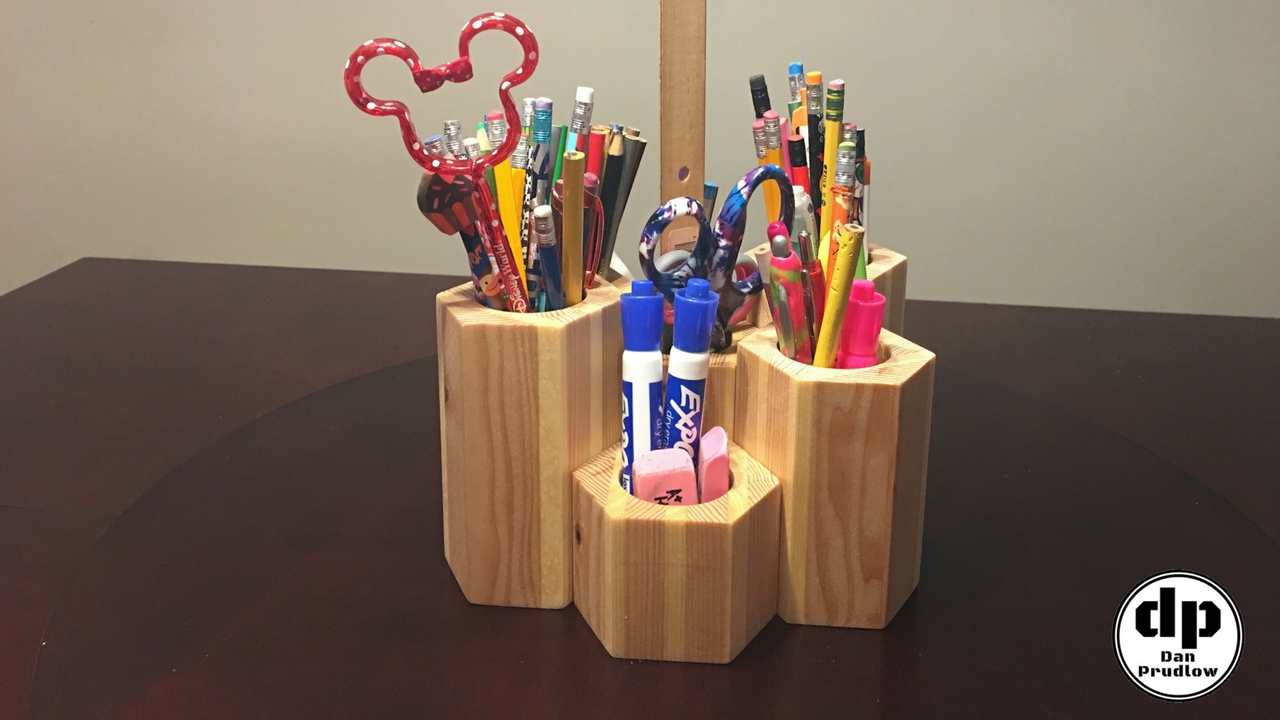
Assembly in Sections
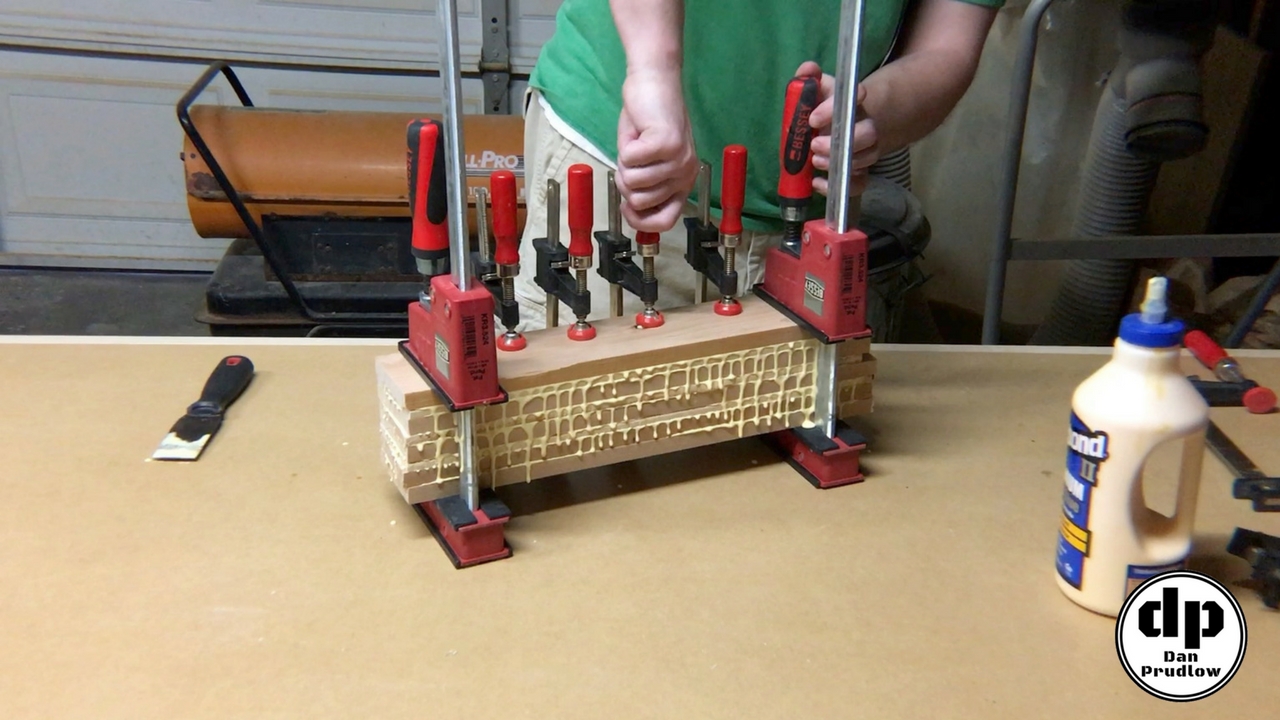
With the holes done I gave everything a good sanding up to 220 grit and then proceeded with gluing the sections together. I started by making two sections that each had one of the tallest pieces and one of the next size shorter. I glued and clamped these and set them to dry.
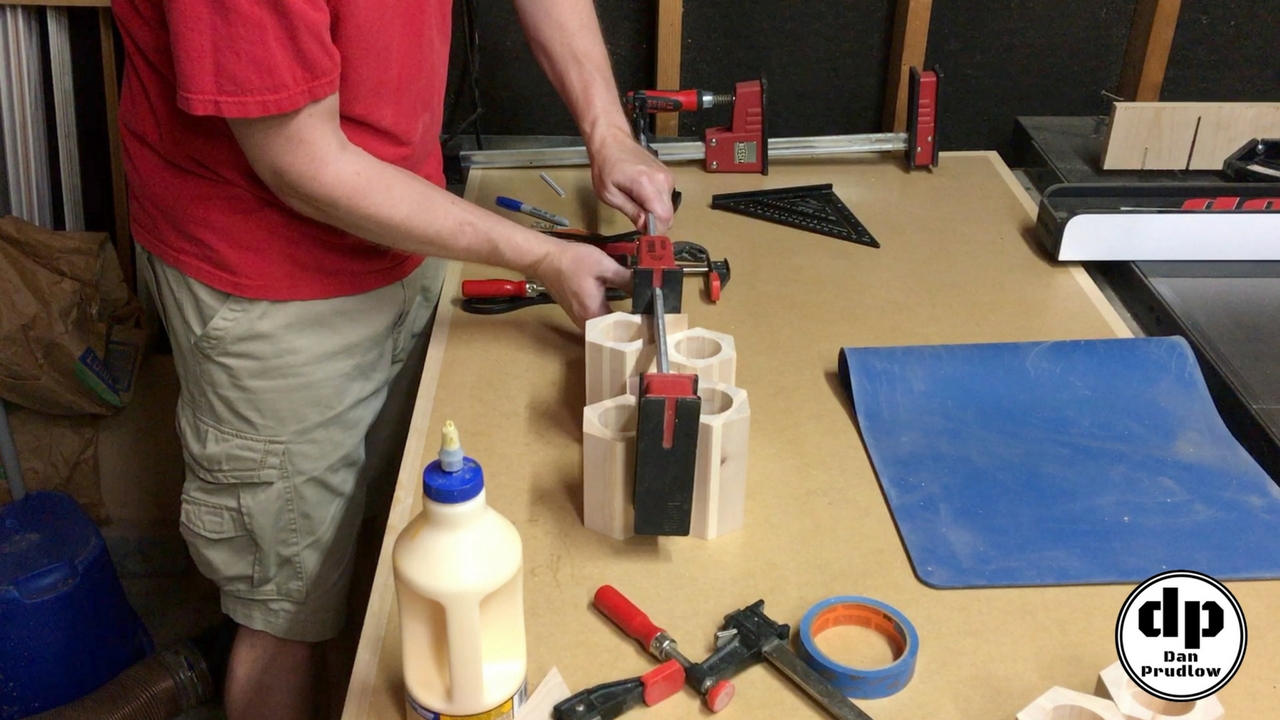
Next I glued in the middle section which was just a little shorter than the two pieces I had previously put together. In order to be able to clamp this section in I used a couple of the offcuts from cutting the angles to create a flat clamping surface. The triangular shaped offcuts fit into the angled faces a create a flat outside surface that the parallel clamp face can press on. Again I let the piece sit overnight to dry.
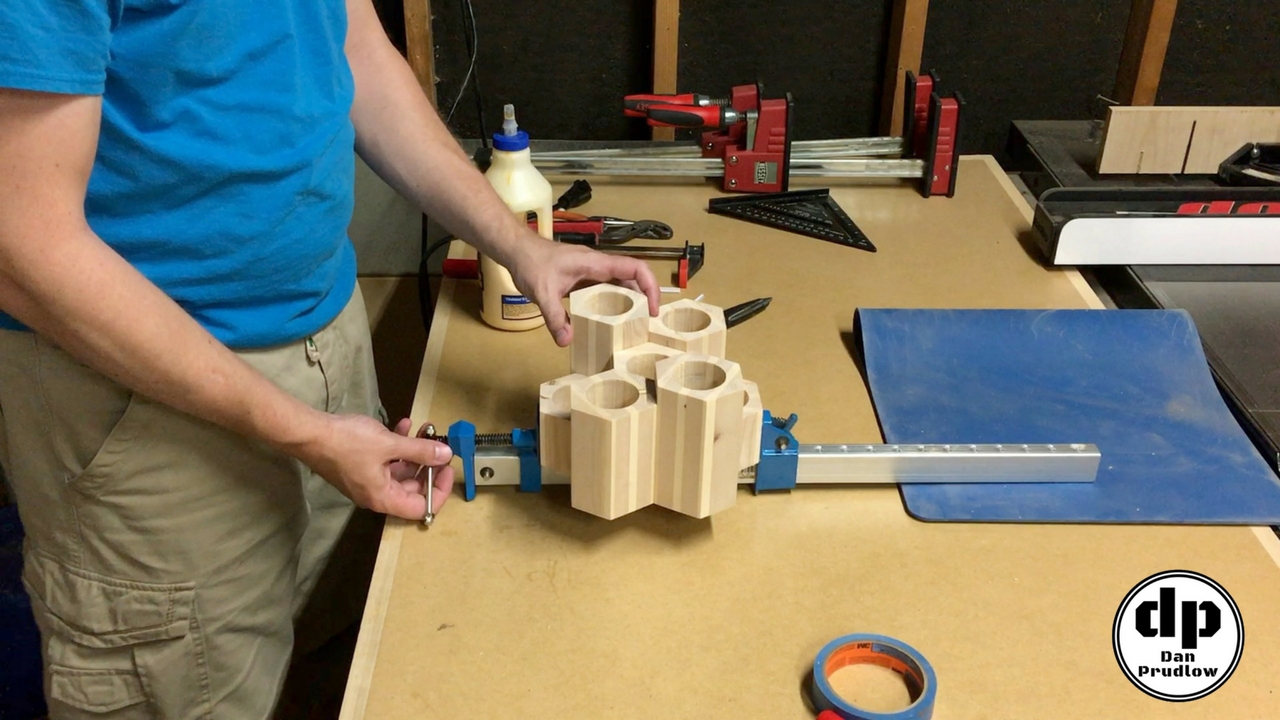
Finally, I glued on the two smallest parts. These had flat faces on each side so a simple bar clamp was all that was needed this time. It was about this time that I actually felt like this pallet wood project was actually going to turn out quite well!
Final Sanding and Finish
The glue up was now complete so I ran the bottom over the belt sander to smooth out any glue squeeze out and smooth out any variations in the pieces. After just a few minutes I had it sitting perfectly flat on the table saw. The table saw surface is a great reference surface for checking if things are flat.
With the assembly complete I did some final touch up sanding and then added a danish oil finish. The finish really brought out the color variations in the two types of wood and also revealed the grain quite well.
Pallet Wood Project Complete!
That’s going to wrap up this pallet wood project. I wasn’t really sure what to expect when I first started but I’m really happy with the result. This was a fairly simple project and it was great to create something with the wood from the pallet from my table saw. Every time I see this thing around the house I’ll remember getting my SawStop and how exciting that day was!
If you have any questions or comments leave them in the comments section below. You can also find me on Twitter and Instagram or you can send me a message via the contact page. Also, please be sure to get subscribed to my YouTube channel so you don’t miss any future builds!
You can find links to many of the tools, accessories, and finish products I use in my shop over on my Tools & Resourcespage.